
 Fast Next Working Day Delivery
 Bulk Discounts Available
 Order Pre 2pm for Delivery
 How to Install Foil-Tec Single/Double on Floors
Here we display a guide on how to insulate floors, with Foil-Tec Single or Foil-Tec Double.
Foil-Tec is a thin, highly reflective multifoil which will retain maximum heat and radiant energy, whilst only being 1mm in thickness. It’s slim profile makes Foil-Tec a simplistic product to install with little steps.
A main benefit of Foil-Tec is that the product is consistently continuous and overlapped, meaning it removes all draughts.
This product high as extremely high foil emissivity of 0.02. This figure relates to reflecting 98% of radiant energy. When this product has a 50mm cavity above in floors, it will equate to 73mm Mineral Wool, whilst being only 1mm in thickness!
Foil-Tec Single only has a high reflective foil on both sides, whilst Foil-Tec Double has a reflective foil on both sides.
Create a highly reflective, draught proof membrane for below your floorboards! Foil-Tec is a simplistic product to install which will prevent heat escape, save on energy bills, and prevent damp/condensation.
view_day Insulation Materials
Method Steps
-
Roll out Foil-Tec
Start by rolling out Foil-Tec over the joists. It is recommend to roll the insulation perpendicular to the joists. Avoid cutting the length just yet, as the recess will use up extra material.
-
Create a recess with Saddle Clips
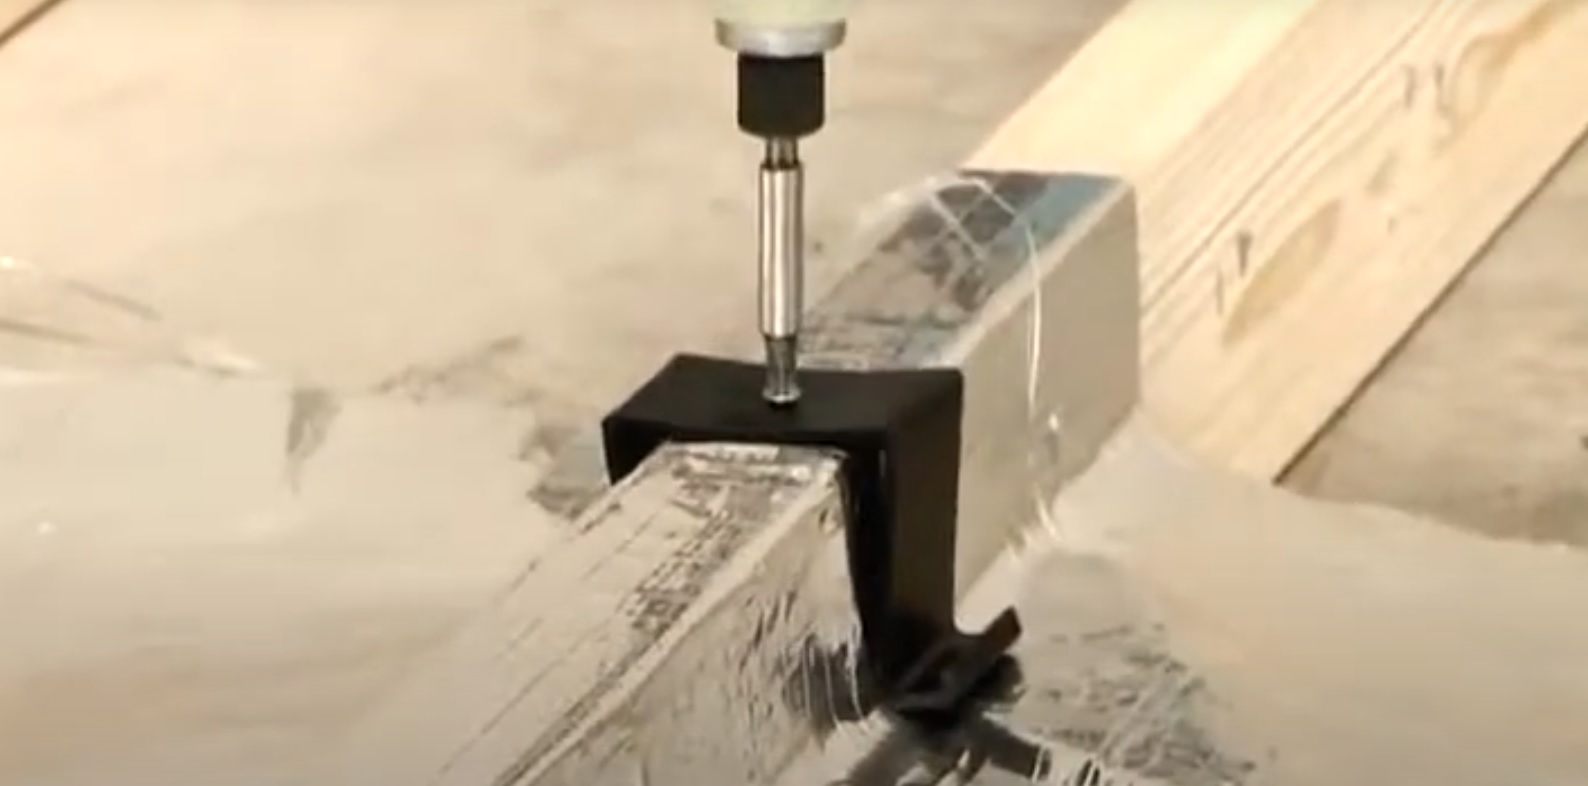
Saddle Clips are important for keeping the insulation fixed in place, but additionally to create an even air cavity. Install Saddle Clips over the joists, which fits Foil-Tec snug around the timber. We recommend 4 saddle clips per m2
-
Alternate method - using Staples
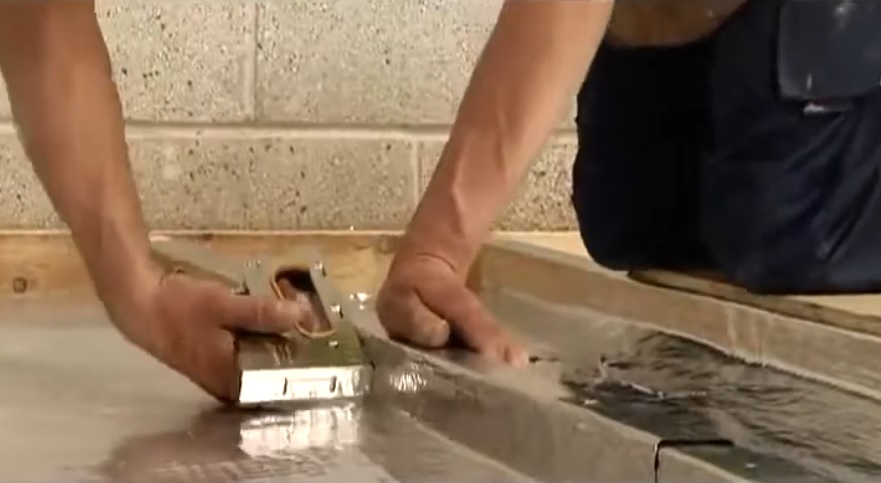
An alternate method if you wish to avoid Saddle Clips is to staple. Staple Foil-Tec down the joists, to create an air cavity. Tip - the further down the joists, the greater the thermal benefits! This is because an increased cavity will give an improved R-value.
-
Overlapping Foil-Tec
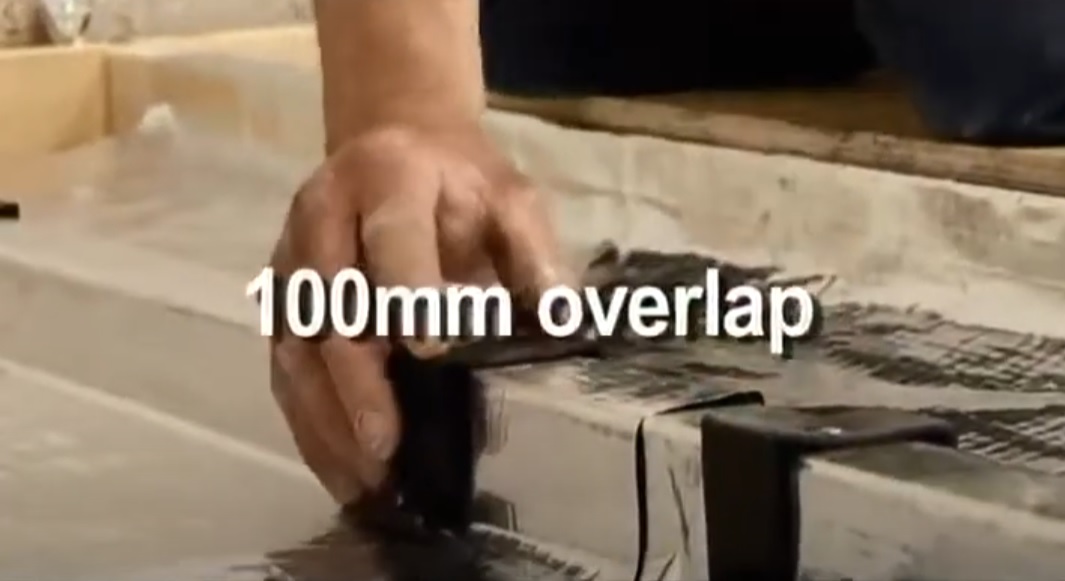
Overlap Foil-Tec by a min 50mm, however to a max of 100mm. This prevents any draughts. Ensure any overlaps are left un-taped. This allows any potential moisture build-up to properly escape.
-
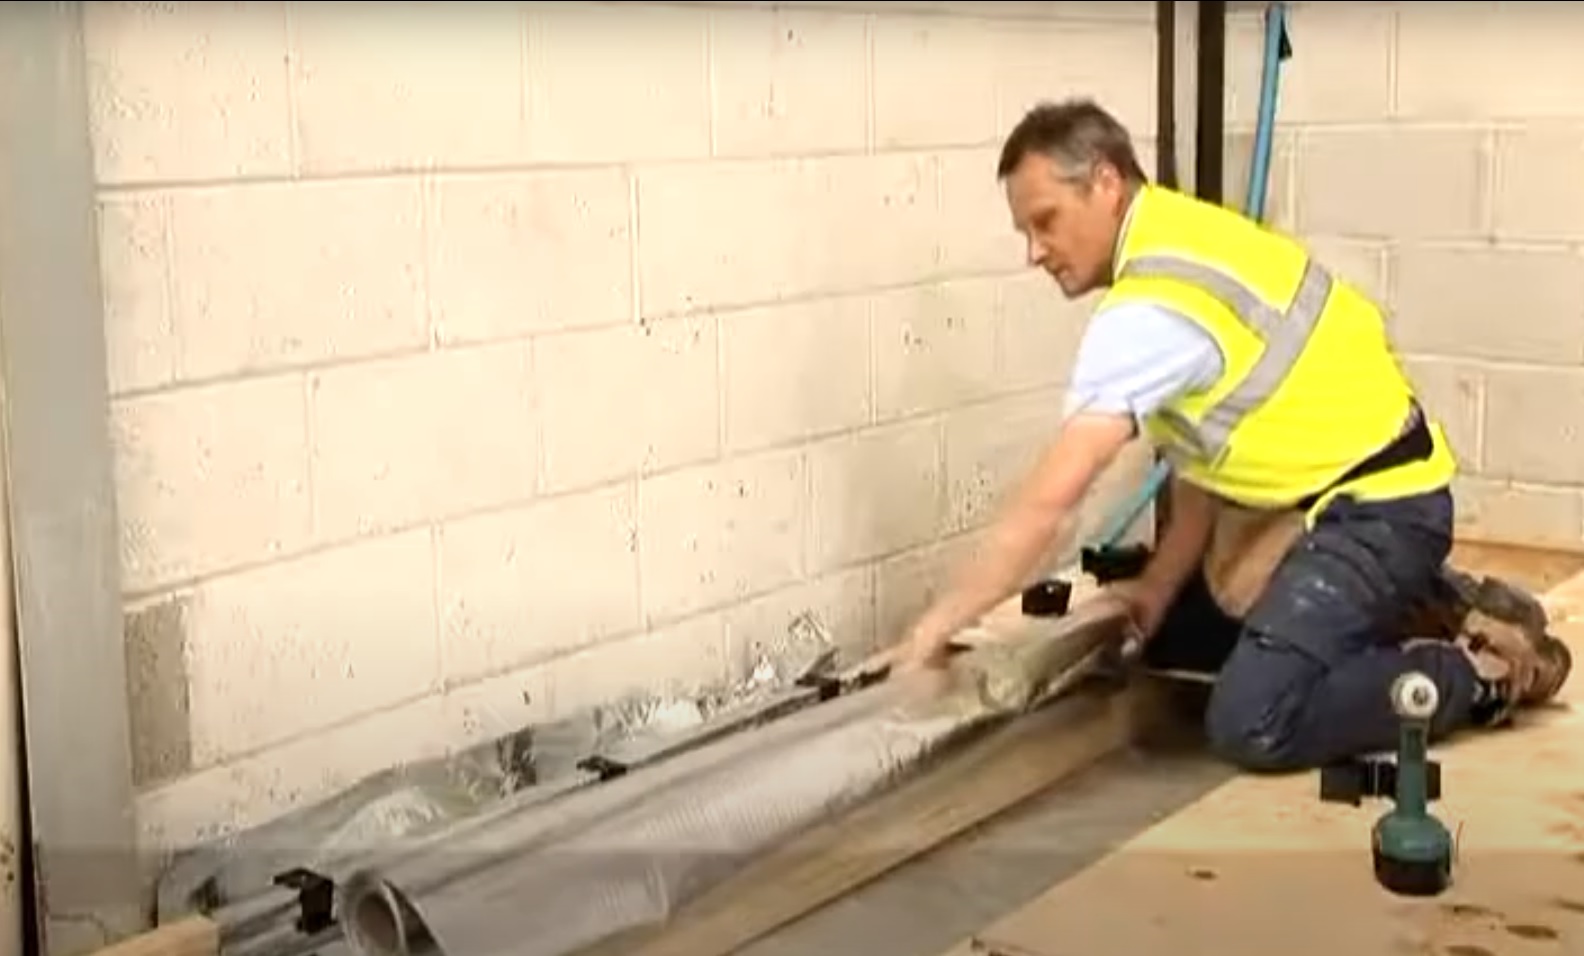
Ensure Foil Tec is lipped up the walls
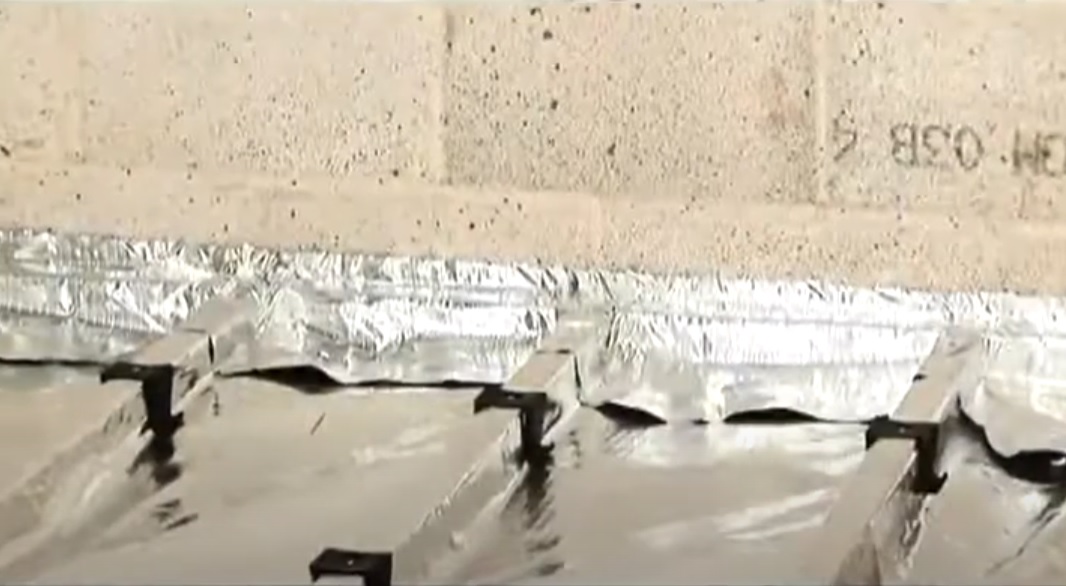
Around the perimeter, it is important to lip Foil Tec up the wall. It needs to be taken up by a min of 50mm. This will generally be then hidden by chipboard and skirting board. This is to prevent any draughts. Follow with Thermaseal Foil Tape around the perimeter.
-
Finish by installing Chipboard
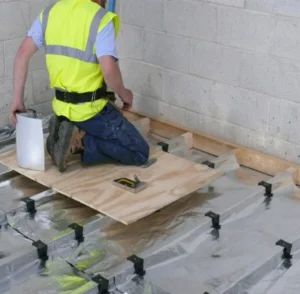
Once all the insulation is fixed down and recessed, you are now ready to install your finished floorboards.
Any questions at all, just get in touch here. You can either submit an enquiry or you can request a call me back. We are more than happy to assist you.
Disclaimer – Multifoils Direct cannot be held responsible for any losses financially or physically from advice provided in this How-To-Guide.