 Fast Next Working Day Delivery
 Bulk Discounts Available
 Order Pre 2pm for Delivery
 3 Layer Multifoil ReRoof System
3 Layer Multifoil ReRoof System
Superior Roof Insulation – 0.18 U-Value
Fed up with using expensive PIR? Our 3-Layer Multifoil ReRoof System means you can save Time, Space, and Money without using PIR.
Instead, you can use 3 Layers of Multifoil Insulation, for your Re-Roof Project and still meet UK Building Regulations. In this 3-Layer Multifoil Re-Roof System, there is no requirement for any Kingspan / Celotex.
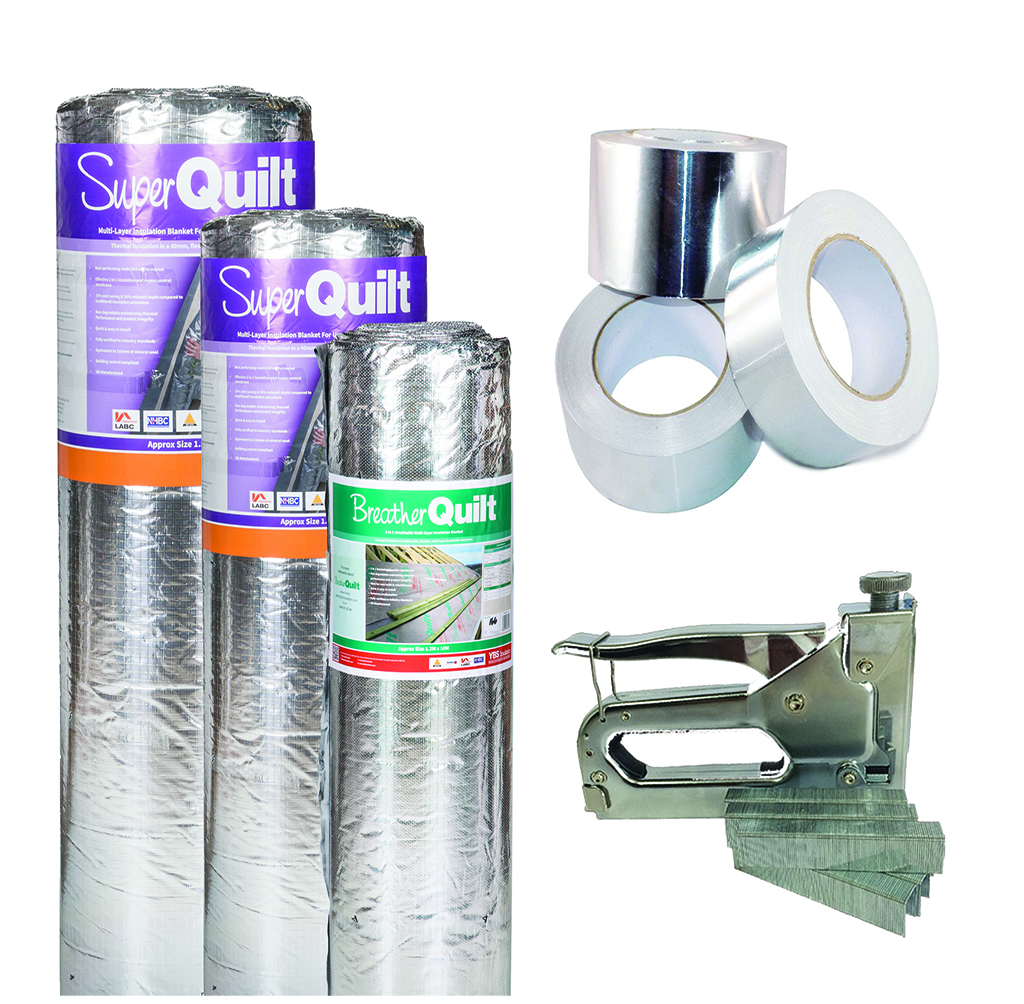
Multifoils Direct Multifoil Insulation 3 Layer system consists of two layers of YBS SuperQuilt and one layer of YBS BreatherQuilt.
Both SuperQuilt and Breatherquilt are fully LABC, BDA certified. This means there will be no problem passing the building control regulations for Refurbishment & Extension projects (currently, 0.18 U-value is required)
This solution also means you do not require an additional breather membrane (Externally) or a Vapour Control Layer (Internal). This is because the Multi-layered blankets involved in the solution have these built in. This saves you, even more, cost as you will not need to order these additionally.
If you are unsure if this insulation solution will work in your project? You can Visit our Free and Instant U-value Calculator today!
One 12m² kit of our 3 Layer Re-Roof system contains the following;
- YBS SuperQuilt 1.2m x 10m (Double Layer)
- YBS BreatherQuilt 1.2m x 10m
- Thermaseal Foil Joining Tape
- Thermaseal Weatherproof Tape
- Heavy Duty Staple Gun & 5,000 Staples (If purchasing 24m² Kit)
- Next Working Day Delivery if ordered before 2 pm
FREE GIFT
Spend £500 + VAT and Choose a FREE GIFT at the checkout!
Free Gifts Include Thermaseal Foil Joining Tape, Heavy Duty Staple Gun Kit, Multifoil Insulation Scissors or Thermaseal Double Sided Tape.
Triple Layer 0.18 Re-Roof System - By Ecohome Insulation
How To Insulate or Re-Roof to 0.18 U-Value
How to Insulate Your Roof Without Any Kingspan or Celotex
-
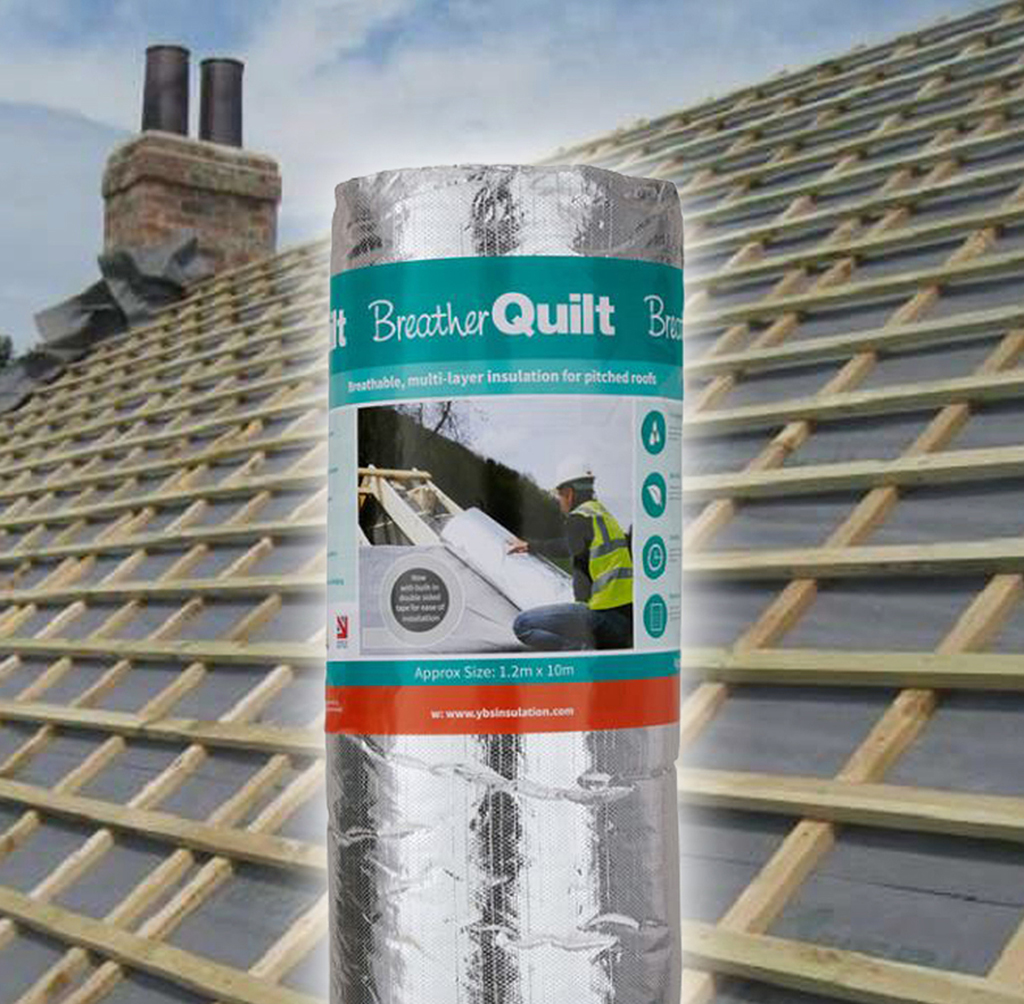
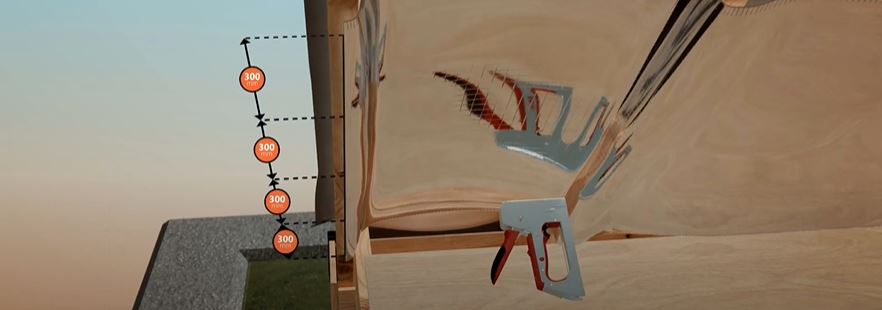
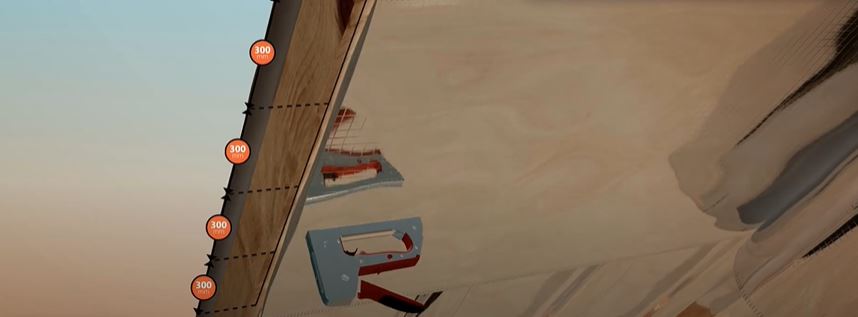
Install your first layer of BreatherQuilt
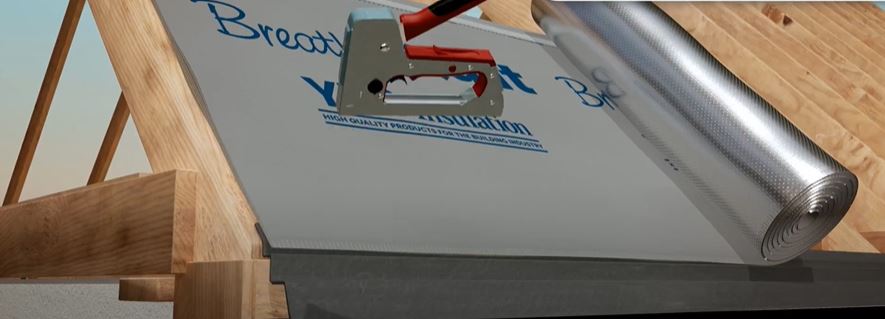
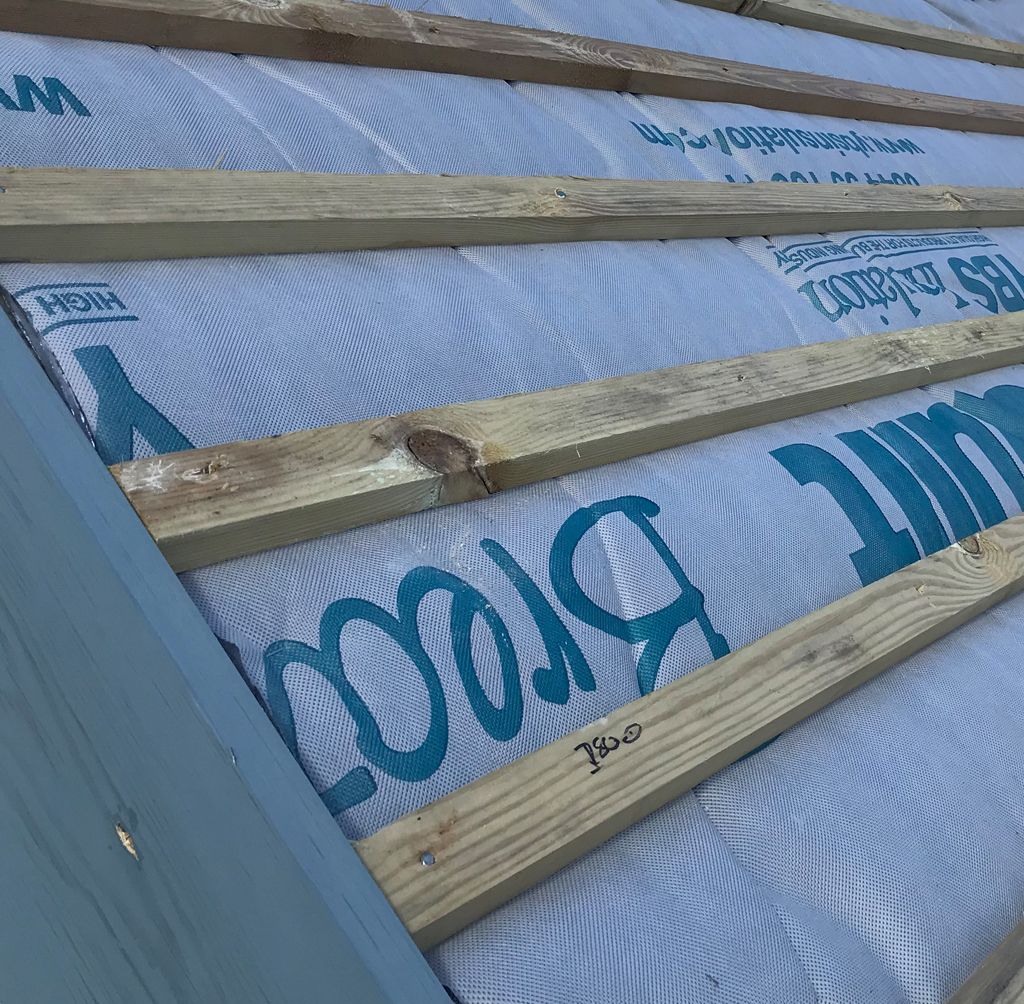
Firstly, install BreatherQuilt Insulation on the external of your pitched roof. The reflective foil will need to be facing inwards. Begin at the bottom of your rafters. Staple BreatherQuilt to the first rafter, using 14mm staples (Max 300mm spacing). Roll BreatherQuilt horizontally across each rafter, stapling continuously to ensure the product is secured. BreatherQuilt should sag between the rafters as opposed to being pulled taught. Ensure that once the tile battens are installed, there is a clear 10mm gap between the top layer of BreatherQuilt and the tile battens.
-
Install next run(s) of BreatherQuilt
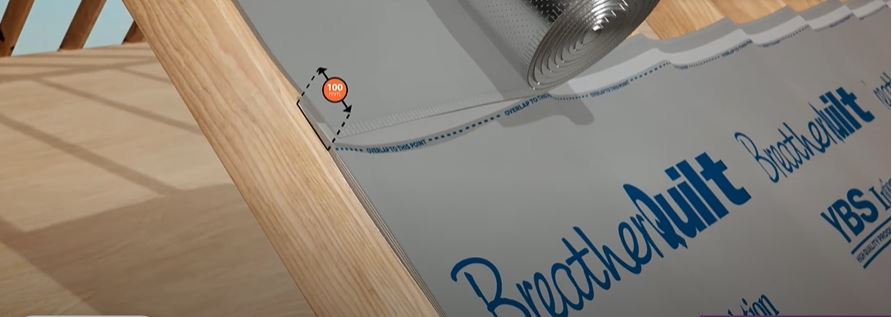
Install the next layers of breatherquilt, ensure that you overlap the product by 100mm. Use the Double Sided Tape that is already on the breatherquilt to secure the two runs and then staple as you did before. Repeat this process as many times as needed, dependent on how many runs are required for the roof. Additional rolls on the verticals should be butt jointed on the rafters. Ensure the butt jointed rolls are stapled as previous and taped using waterproof tape.
-
Install Tile Battens & Tiles
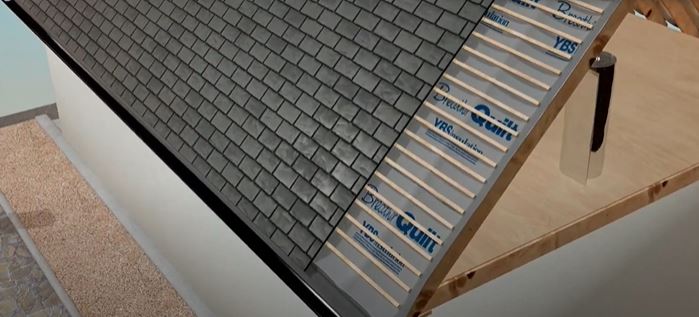
At the eaves, BreatherQuilt should extend onto a suitable eaves carrier. This works in the same method as standard breather membranes. Proceed next by installing horizontal tile battens, on the top of the BreatherQuilt. Finally, finish by install tiles or slates.
-
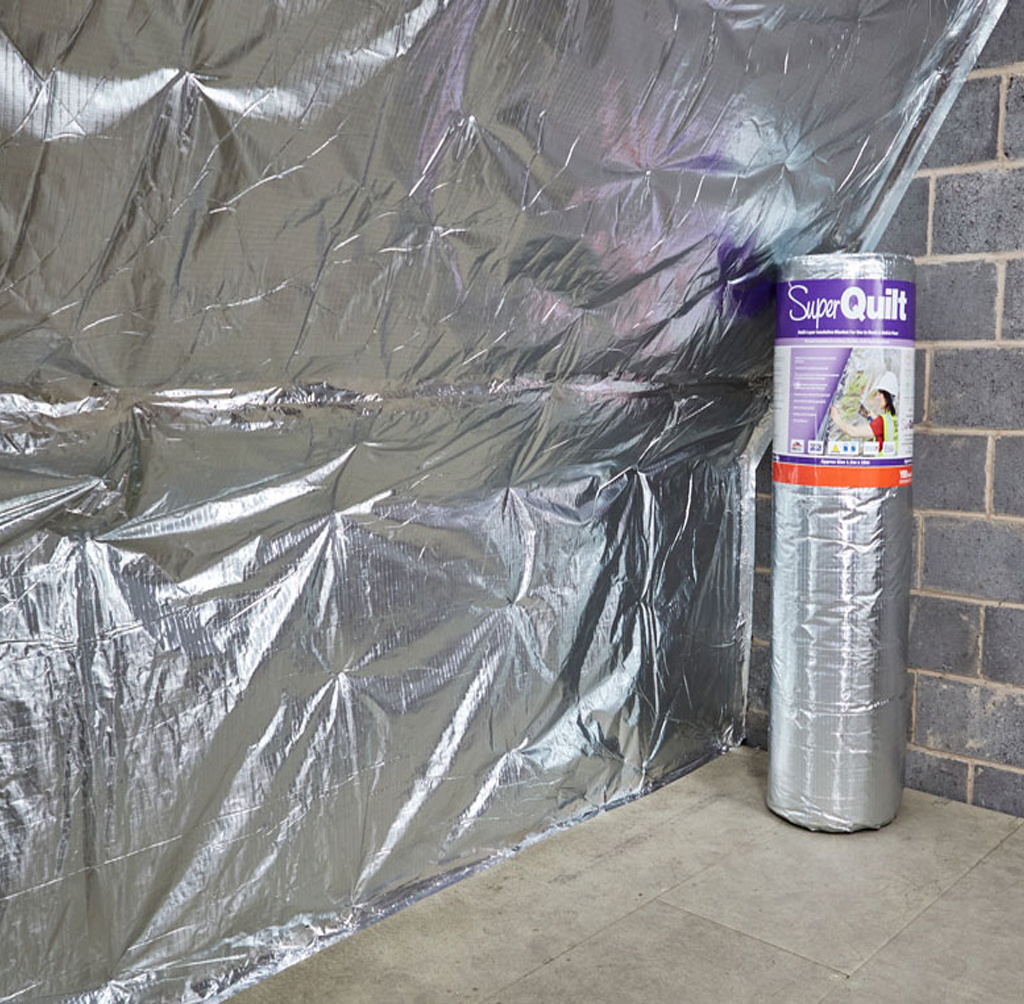
Install the first layer of SuperQuilt
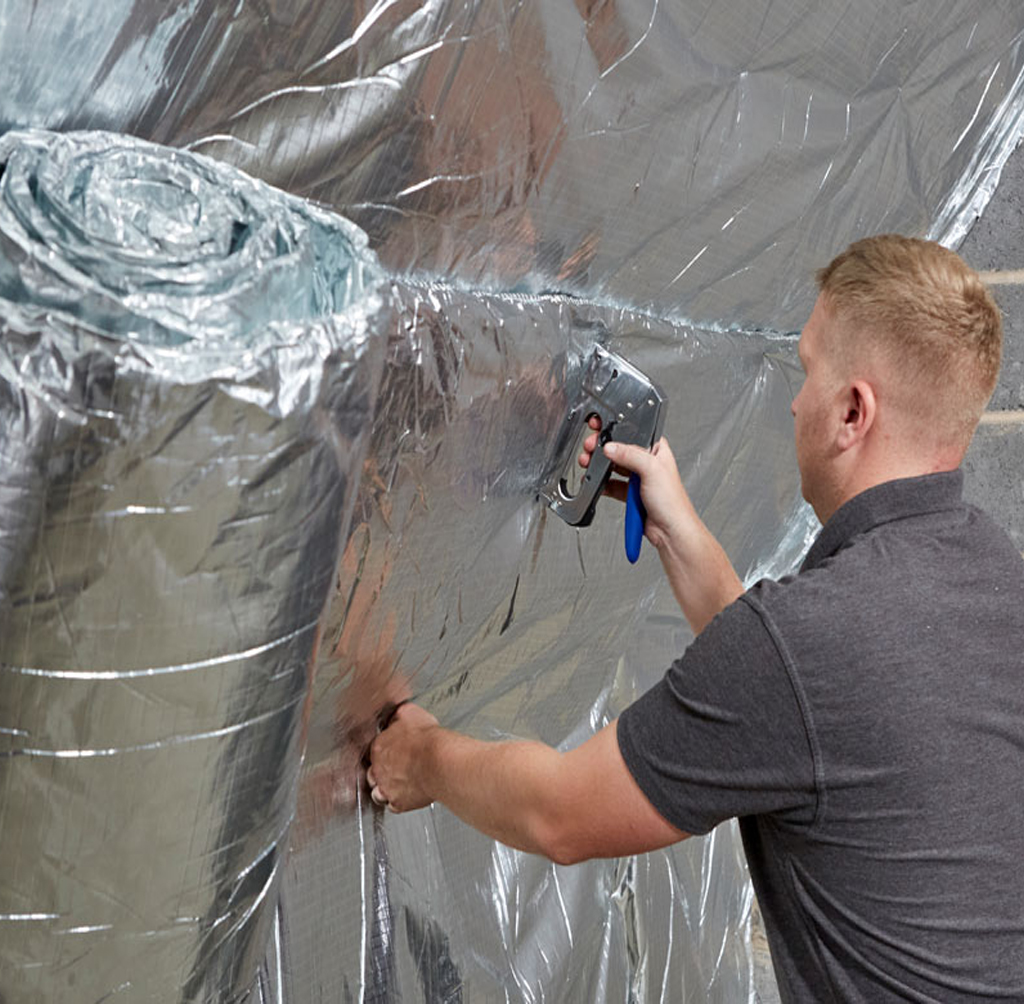
The two layers of SuperQuilt should now be installed on the internal. By internal we are referring to the underside of the roof rafters. The first layer of SuperQuilt is to be recessed in-between the rafters (as per image) Recess by 25mm) and fixed with staples on to the battens. The material is then pulled taught and fixed to the opposite rafter. Tape and seal the first layer, over the laps and around the perimeter.
-
Install the second layer of SuperQuilt
Once the first has been installed then you can now install the 2nd SuperQuilt layer. Staple or nail the second layer through the first layer into the rafters behind. Ensure this layer is also pulled taught, there will then be a cavity between the two layers of SuperQuilt. As per the first layer, the second layer is also overlapped by 50mm. Ensure again the product is fully taped and sealed using Thermaseal Foil Joining Tape.
-
Apply a layer of Timber Battens
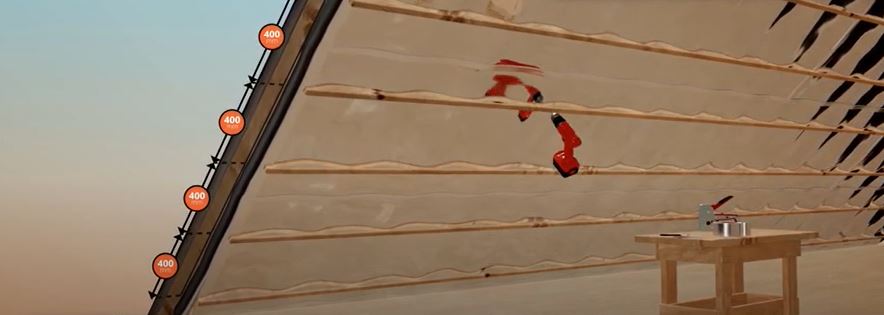
Apply a layer of timber battens, leaving at least 400mm between each one. The battens should be 25mm in depth min, to enable the Superquilt to reflect and perform.
-
Internal Finishing

Once both layers are installed and taped, you are ready for your batten & plasterboard. Start by installing min 25mm battens on the insulation. We advise to cross-batten, however vertical battens can be used. Finish by installing 12.5mm Plasterboard. There is no requirement for a Foiled-back plasterboard or VCL. SuperQuilt works as a high performance Vapour Control Layer when taped and sealed.
There are no reviews yet.