
 Fast Next Working Day Delivery
 Bulk Discounts Available
 Order Pre 2pm for Delivery
 How To Achieve a 0.18 U-Value with our TyvaQuilt System
This page will offer you a step by step guide of how to install our TyvaQuilt solution, on a pitched roof. When installed this solutions enables you to achieve a 0.18 U Value, in your roof.
TyvaQuilt is a quick, simplistic three-product procedure to achieving refurbishment regulations. First, SuperQuilt under rafter, second non itch between the rafters and finally breatherquilt over rafters.
Our bespoke solution is proven to save cost, space, wastage & installation time compared to Rigid PIR Insulation (Kingspan / Celotex)
Require a U-value document for building control? Visit our free & easy to use Online U-value Calculator. Receive instant solutions in less than 60 seconds! Click Here to Use!
Require a 0.18 u value, on a pitched roof? Use this 3 product solution to achieve this whilst saving on cost, space and time!
Here at SuperQuilt Insulation, we are the leading distributors of multifoil insulation products. We can offer you technical advise and also a fast next working day delivery, to anywhere in the UK Mainland (On orders placed before 2pm)
view_day Insulation Materials
build Tools
Method Steps
-
Install SuperQuilt Under Rafter
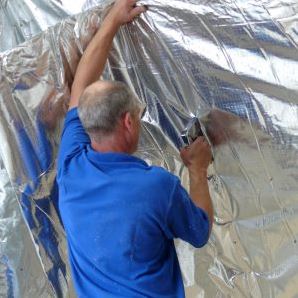
Install the SuperQuilt underneath the rafters horizontally, when installing staple every 300mm to ensure the SuperQuilt hold securely in place. When you have completed this - tape and seal around all the edges and joints using the Thermaseal Foil Joining Tape. This tape is included with the Tyva Quilt Kit.
-
Batten and Board
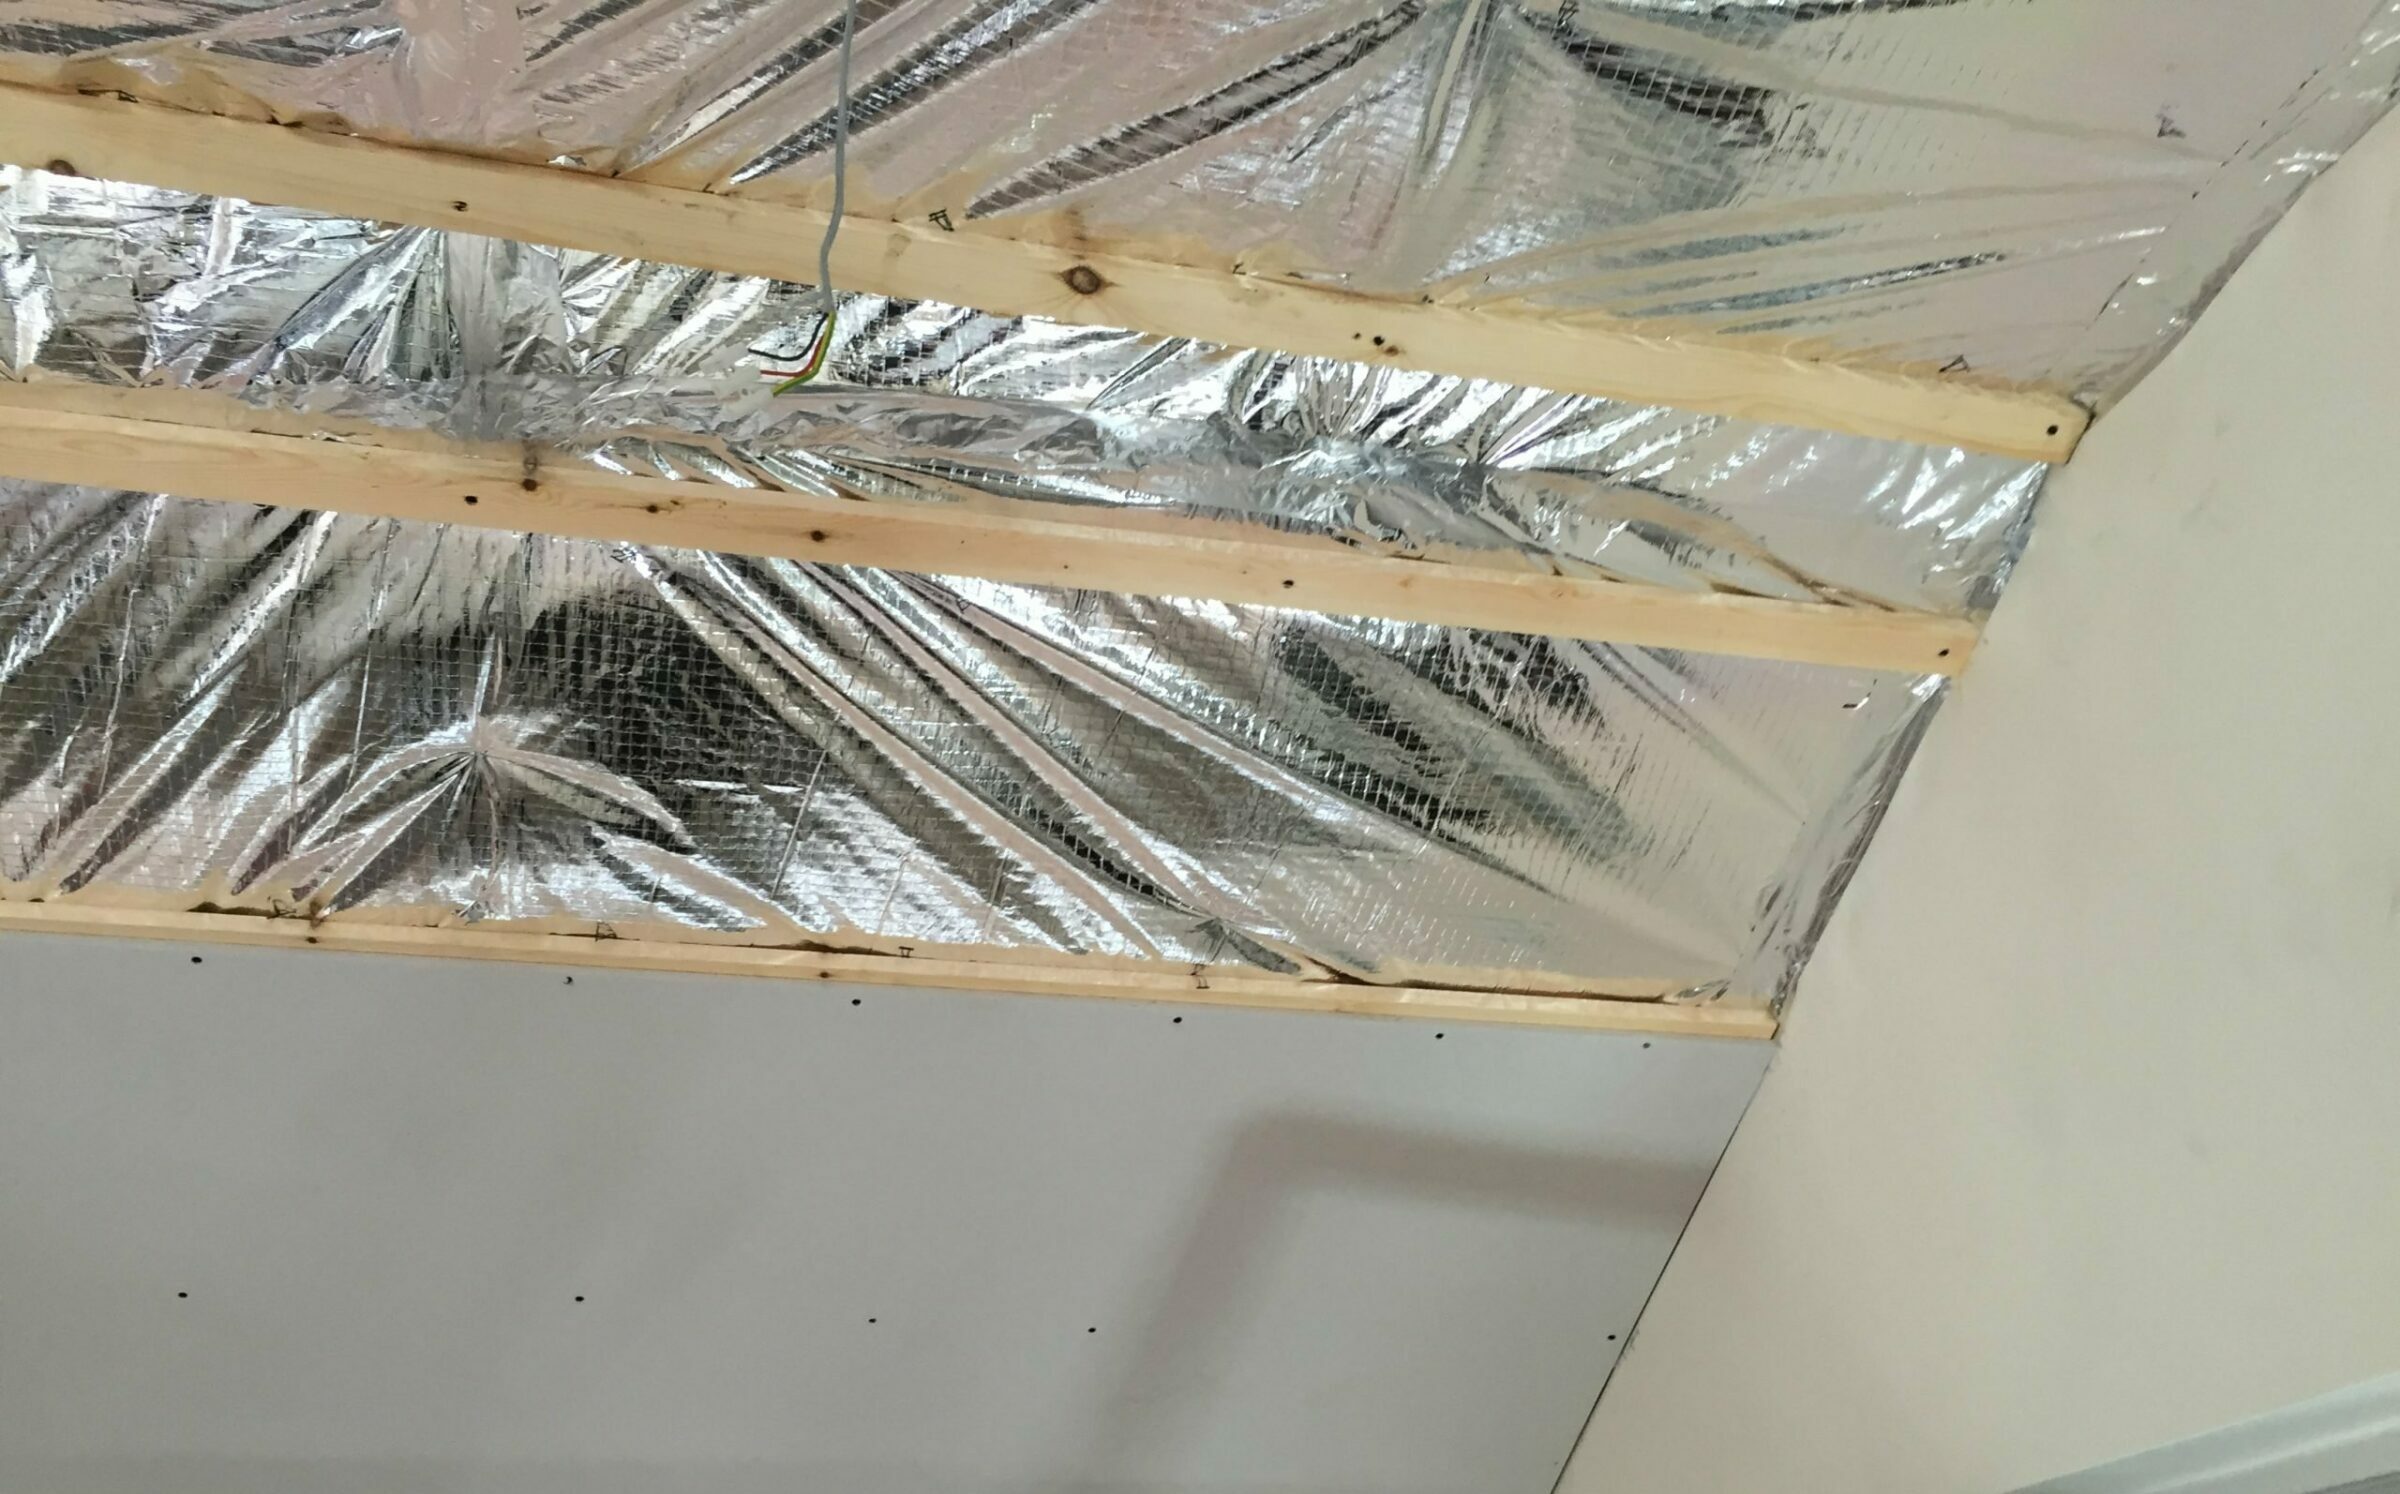
Install battens that have a minimum depth of 25mm. Secure these by going through the SuperQuilt and in to the rafters behind. The gaps between each batten installed should be between 400mm and 600mm. Follow by installing your plasterboard / preferred finish.
-
Install EcoLoft Non Itch
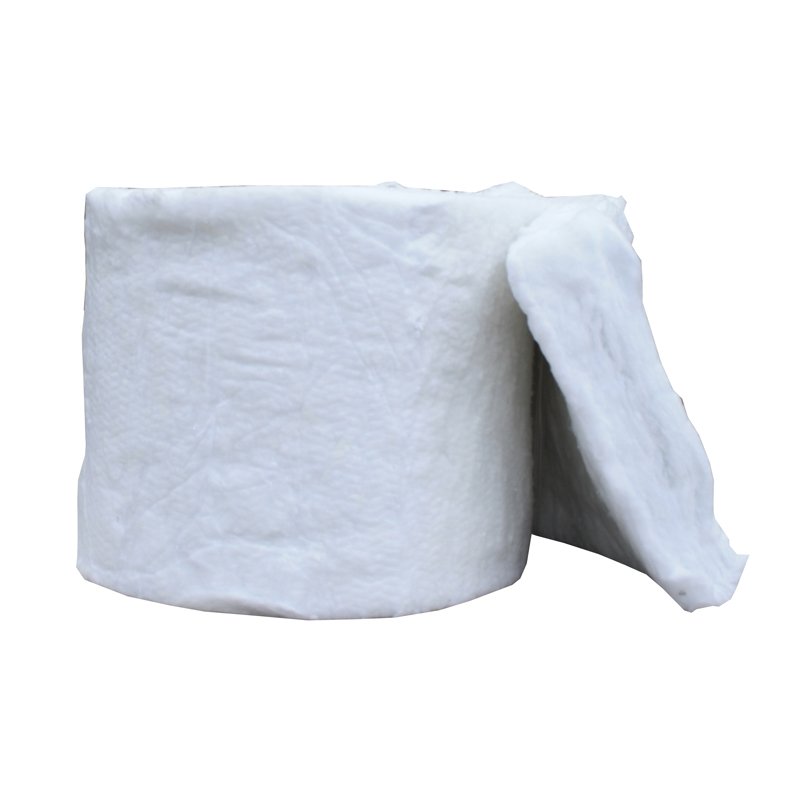
Now between the rafters, you can install the EcoLoft Non Itch. We have two different sizes you can choose from depending on your centres (likely to be 400mm or 600mm). One size is 380 and the other 570 - so choose the one most appropriate for your roof. This material is 100mm thick and you simply install this between each rafter. You need to ensure the non itch is pushed back and that you have an air space between this and your breatherquilt.
-
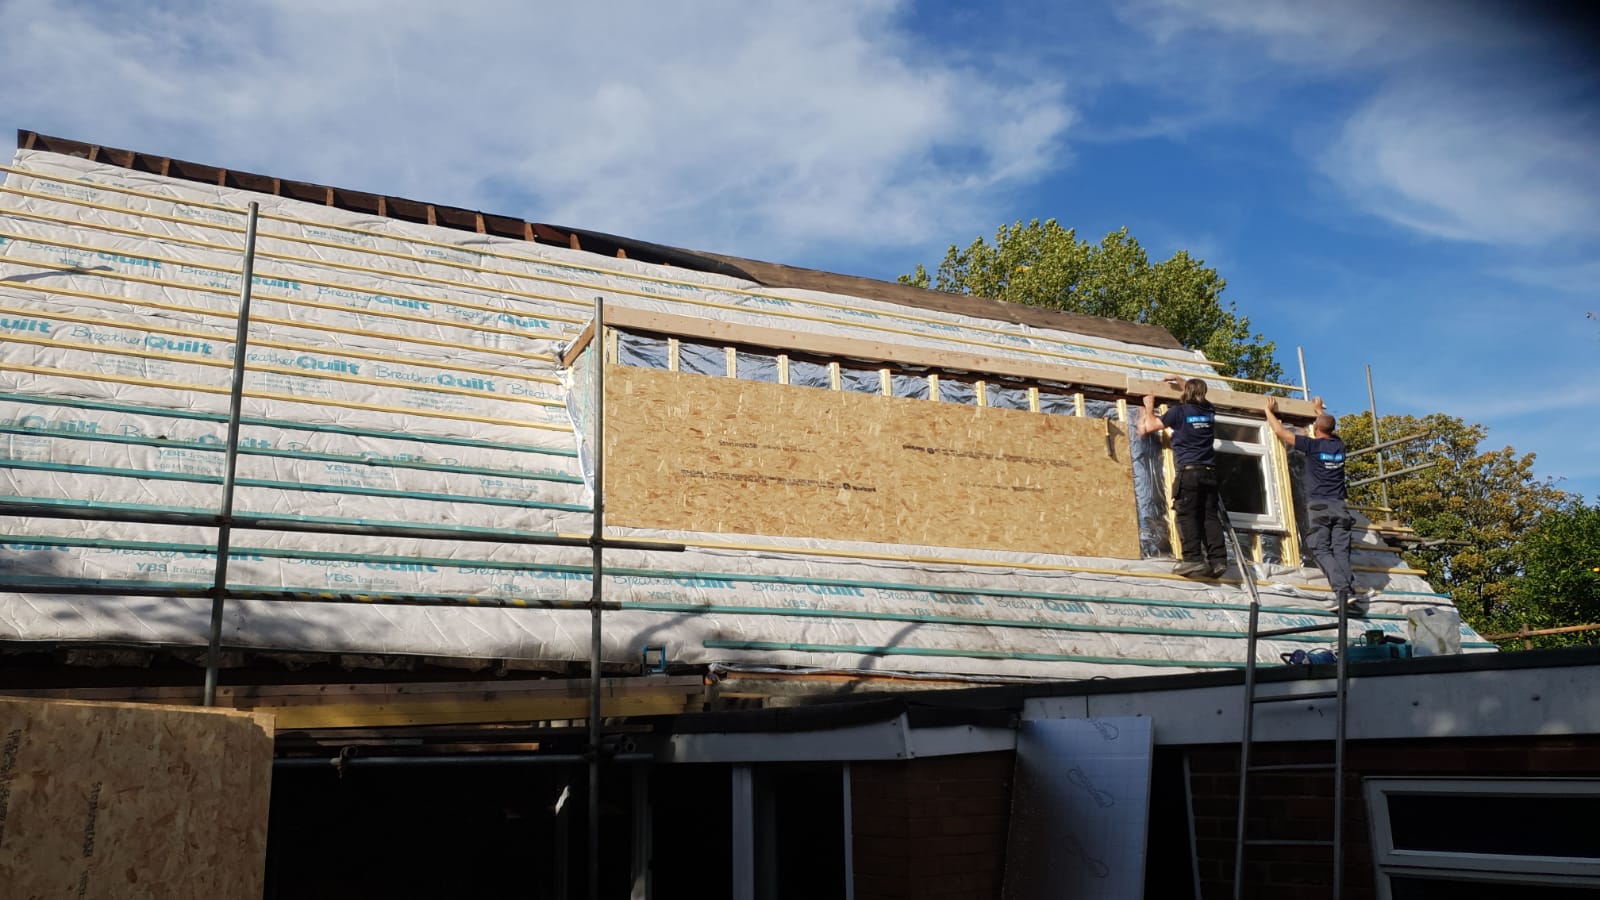
Install BreatherQuilt
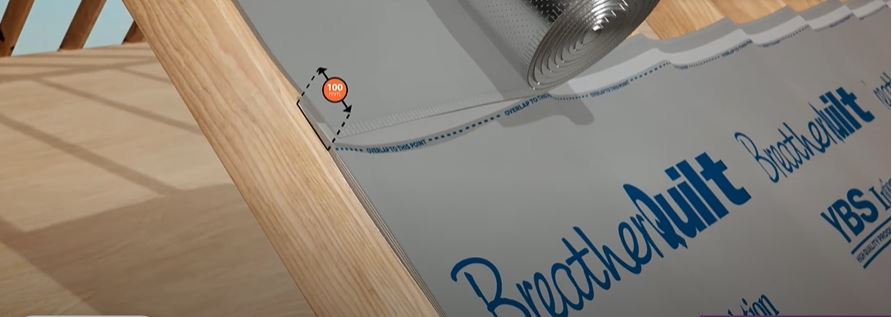
Now you have installed your non itch, proceed at the bottom of your rafters by installing BreatherQuilt horizontally. Staple every 300mm to ensure secure. Ensure that breatherquilt is draped in to the rafters, it does not need to be pulled taught. Each layer of breatherquilt should overlap by 100mm, the tape is fixed to the breatherquilt to seal the two layers together. Vertically the quilt can be bitt joined and taped with the weatherproof tape.
-
Install Tile Battens
When you have installed the BreatherQuilt, ensure you have a 10mm gap between the BreatherQuilt and Tile Batten (in centre of each rafter). At the eaves, BreatherQuilt should extend on to a suitable eaves carrier. Finish with tile or slate finish on tile battens.
Disclaimer – SuperQuilt -Insulation cannot be held responsible for any losses financially or physically from advice provided in this How-To-Guide.
Installation of SuperQuilt & BreatherQuilt should be in harmony with the official certificate. Recommended fixing materials and good building practice should also be used.