 Fast Next Working Day Delivery
 Bulk Discounts Available
 Order Pre 2pm for Delivery
 How To Insulate Walls Using SuperQuilt Insulation
This blog will explain how to insulate walls using SuperQuilt Insulation and also the benefits of using this type of Multifoil Insulation.
Given the currently escalating cost of energy, now is the time to insulate. Most heat energy is lost through the walls in many buildings, so insulating your walls using SuperQuilt Insulation ensures that the cold is reflected out in the winter, whilst the warmth is reflected back in. Also during the warmer months of the year, SuperQuilt will protect excess warmth from entering your home.
Why Should You Use SuperQuilt?
- Only 40mm at a relaxed thickness, and compresses to just 7mm when installed
- Reflects 98% of radiant energy
- 19 Layers of Highly Reflective Foil
- True Aluminium Foil at the Outer Layers
- UK Manufactured
- Highest performing EN Certified Multifoil on the Market
- BDA Certified
- LABC Approved
- 1 Layer of SuperQuilt alone, will achieve or surpass the 0.30 U-value in Refurbishment Projects. (A U-value is a calculation of the heat loss, in watts, per square metre.)
- Certified for both internal and external walls, timber frame walls, Dwarf Walls, Roofs and Floors.
- SuperQuilt Multi Foil Insulation is also popular for Insulating Conservatories, Motorhomes, Caravans, Garden Buildings, and Hot Tubs.
A step-by-step guide on How To Insulate Walls Using SuperQuilt Insulation.
1. Install your battens directly onto the solid wall (We would advise using 25mm Battens. In some cases, you may be required to use 38mm Battens, to meet a specific U Value, but if you are not going through building regulations – 25mm are fine.
To find out more information on meeting your desired U-Value, please see the link to our Free, Online and Easy to use U-Value Calculator)
2. Place your battens either horizontally or vertically at 400mm Intervals.
3. Roll the SuperQuilt out on the floor to the required length and cut. (We would advise using a sharp blade or Multifoil scissors. For tips on how to cut SuperQuilt, see our blog ‘The Three Easiest Ways to Cut SuperQuilt Insulation’)
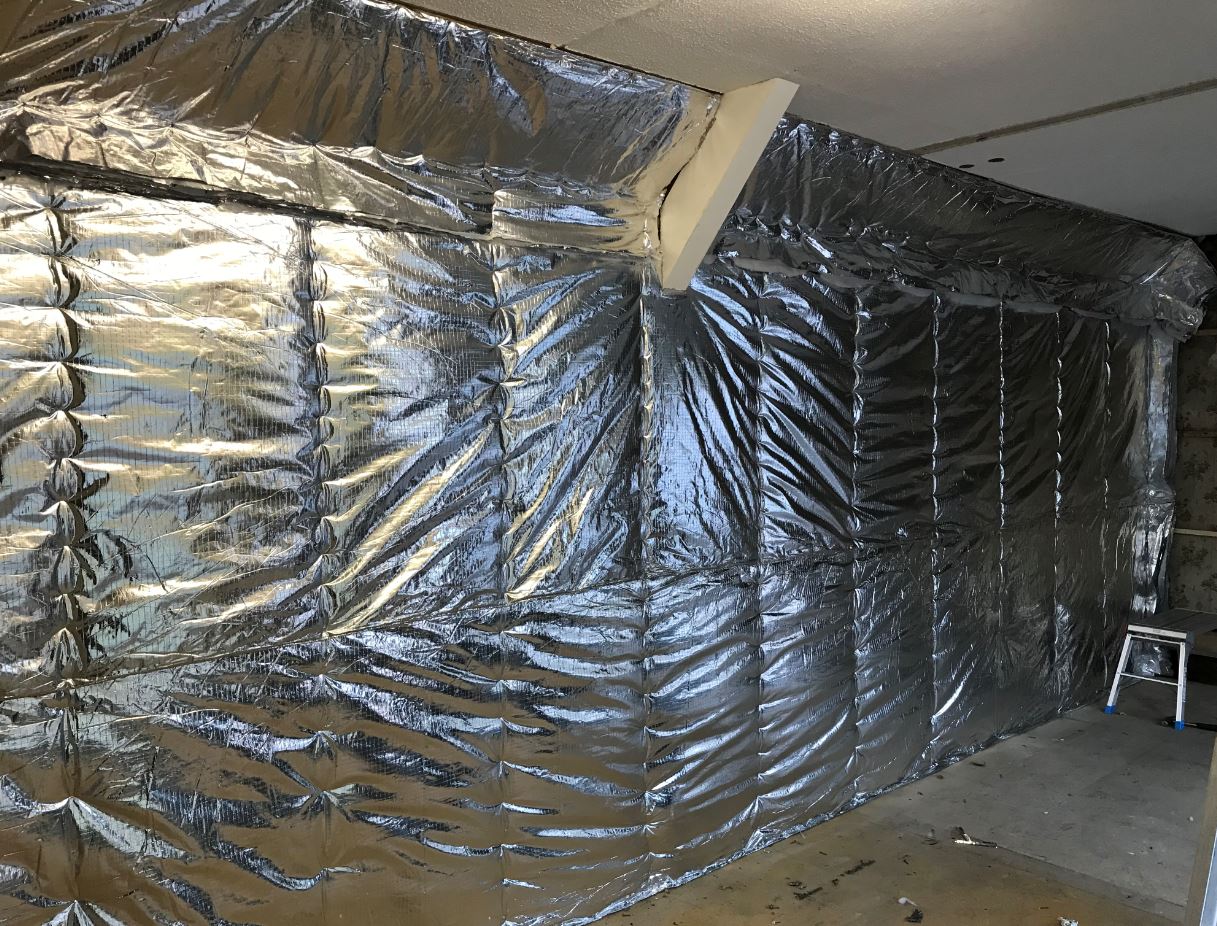
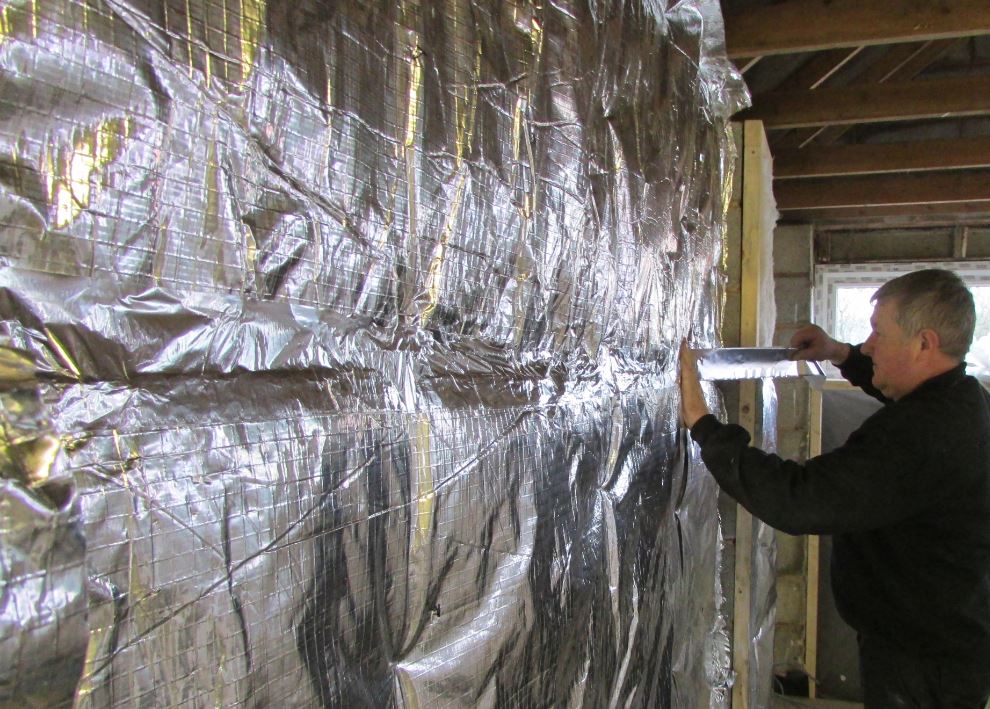
4. Begin at one end of the wall and staple the SuperQuilt on to the battens, using a heavy-duty staple gun and 14mm Staples. (Leaving a gap of 300mm between each Staple)
5. Repeat the stapling process across the wall and around the perimeter too. (TOP TIP: Pull the SuperQuilt taut, to allow the product to expand and reflect into the cavities).
6. Then install the next roll of SuperQuilt, ensure that you overlap the SuperQuilt by a minimum of 50mm.
7. Once you have applied the SuperQuilt to the whole wall, you should tape over all the overlaps and around the perimeter, using our ThermaSeal Foil Joining Tape. This Highly Reflective, True Aluminium Foil will prevent condensation and creates a complete airtight barrier. (One roll of our ThermaSeal Foil Joining Tape is generally required to cover 30m2 of SuperQuilt.)
8. Once you have finished with the Tape, begin installing your counter battens, again these can be installed either vertically or horizontally, at 400mm intervals.(Ensure you apply plenty of pressure when screwing through the SuperQuilt in to the first set of battens)
9. Once all the counter battens have been installed, you can then install the plasterboard. There is no requirement to use a foil back plasterboard, as SuperQuilt works as a vapour control layer so you will save additional costs on your project.
If you need further help installing SuperQuilt Insulation, see our How To Video
To order SuperQuilt, at the lowest trade prices – with Next Day Delivery, on all orders ordered before 2pm – to anywhere in the UK Mainland – CLICK HERE!