
 Fast Next Working Day Delivery
 Bulk Discounts Available
 Order Pre 2pm for Delivery
 YBS SuperQuilt Trade Pallet Deals
YBS SuperQuilt Trade Pallet Deals
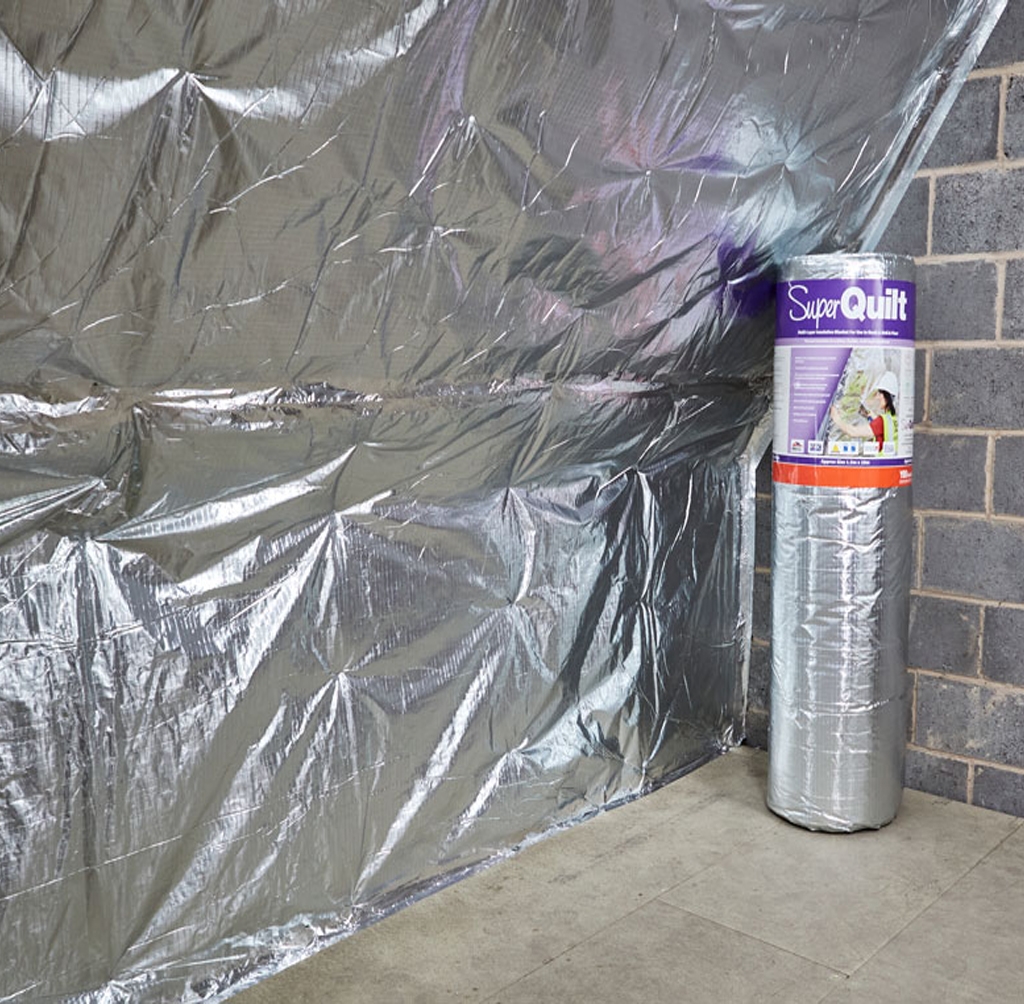
Trade Discount – YBS SuperQuilt
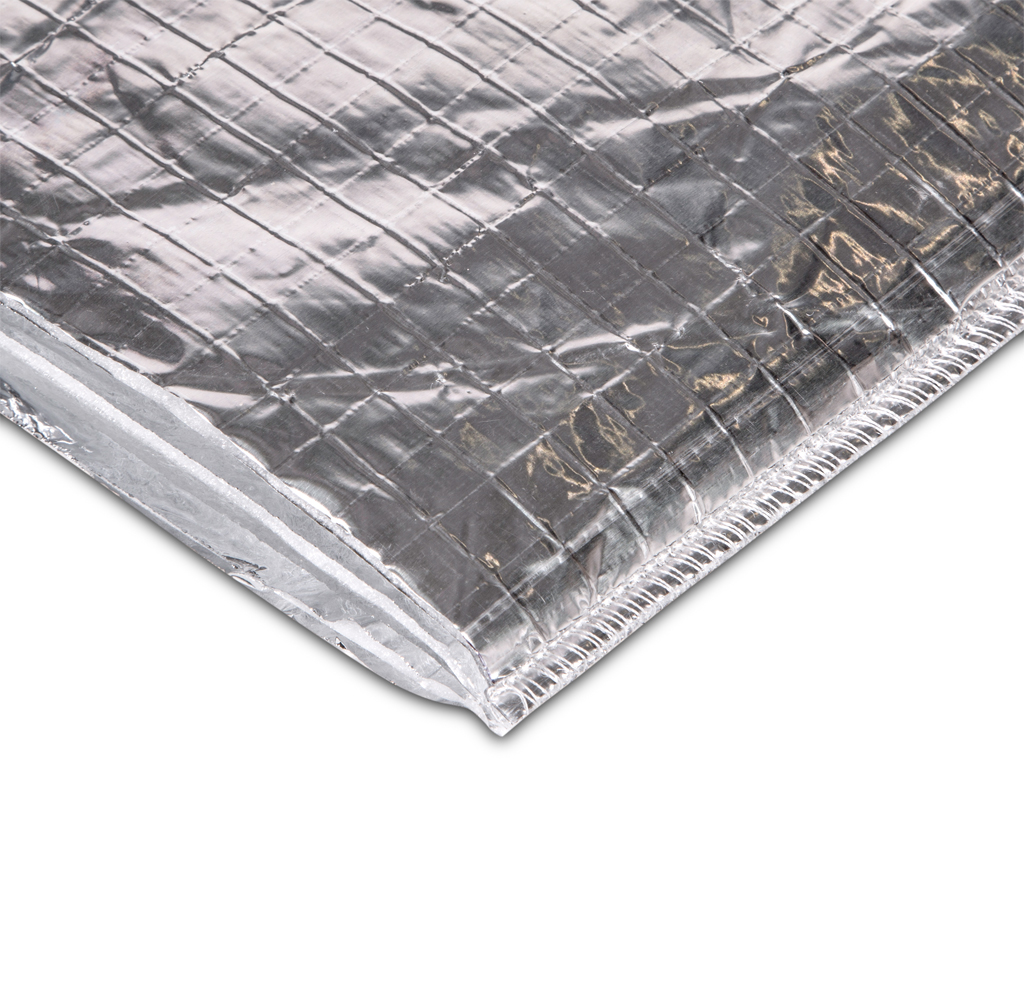
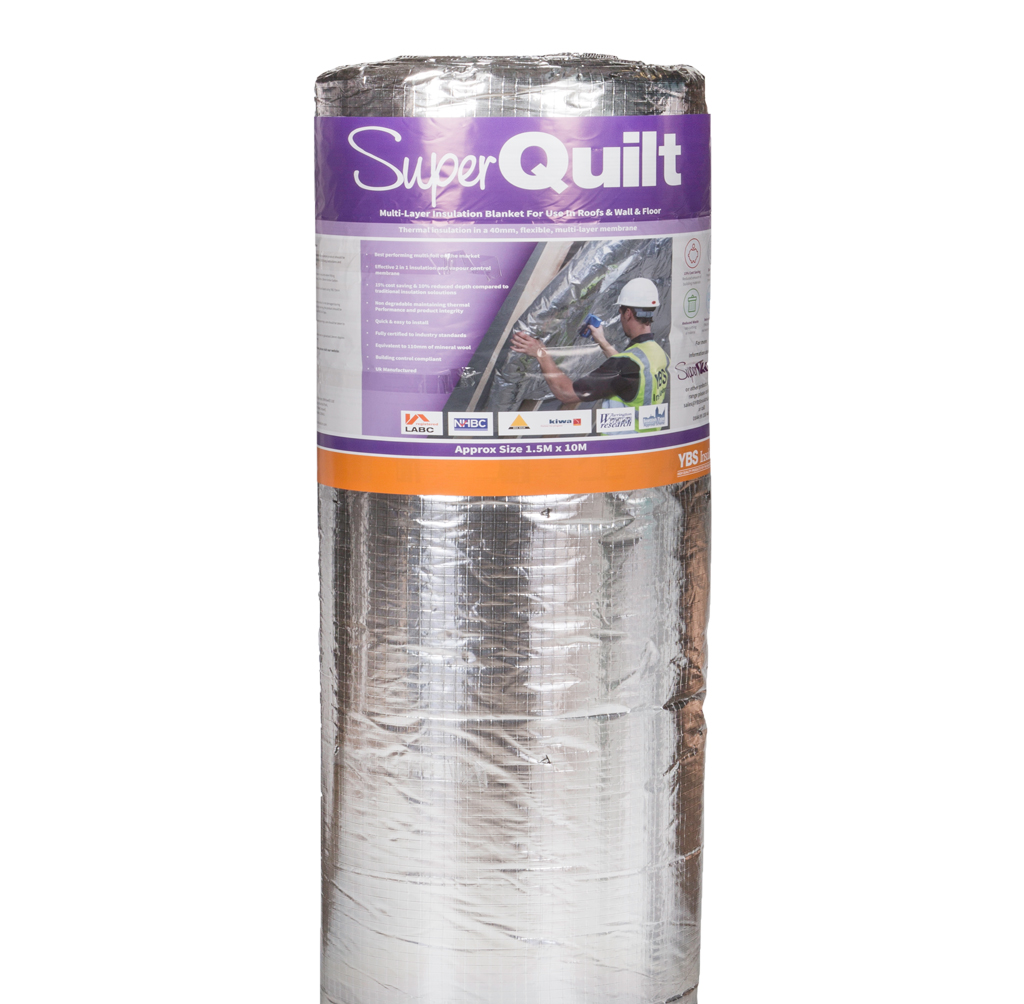
The UK’s highest performing certified Multifoil insulation material on the market.
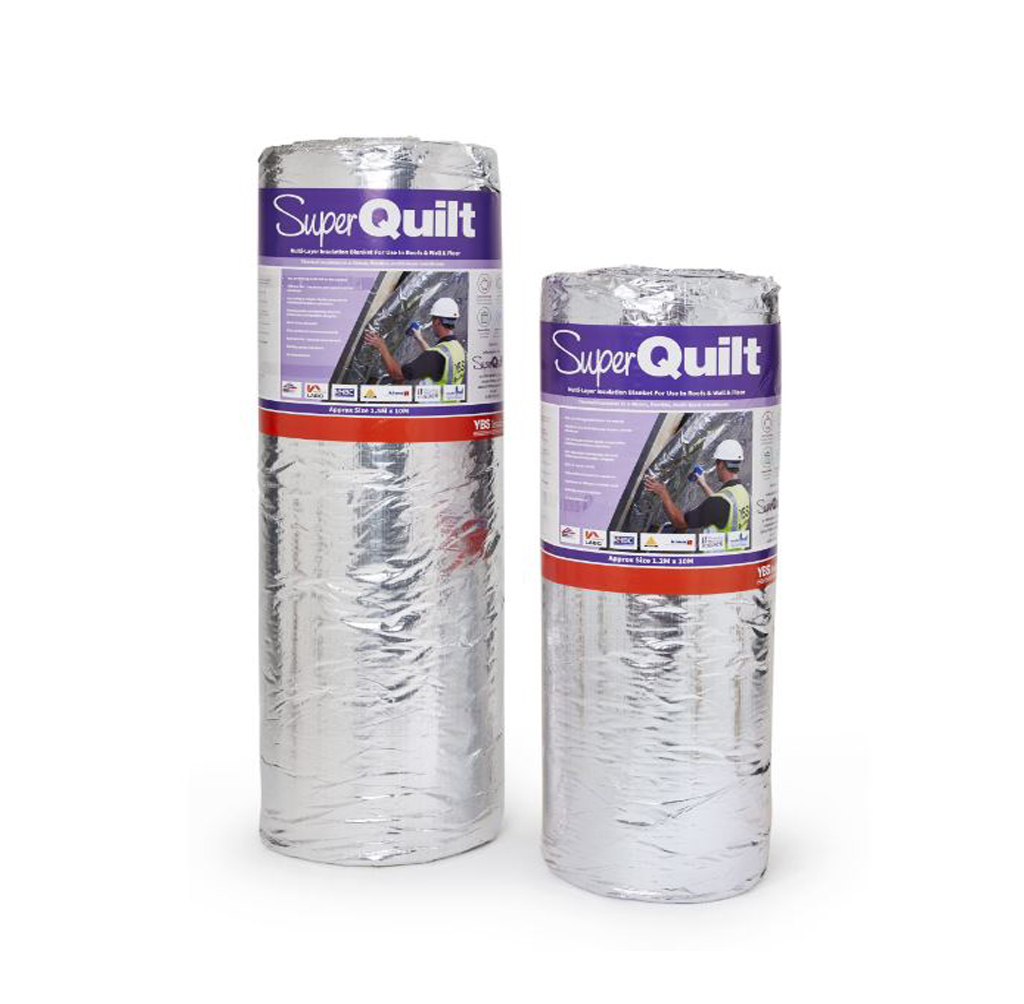
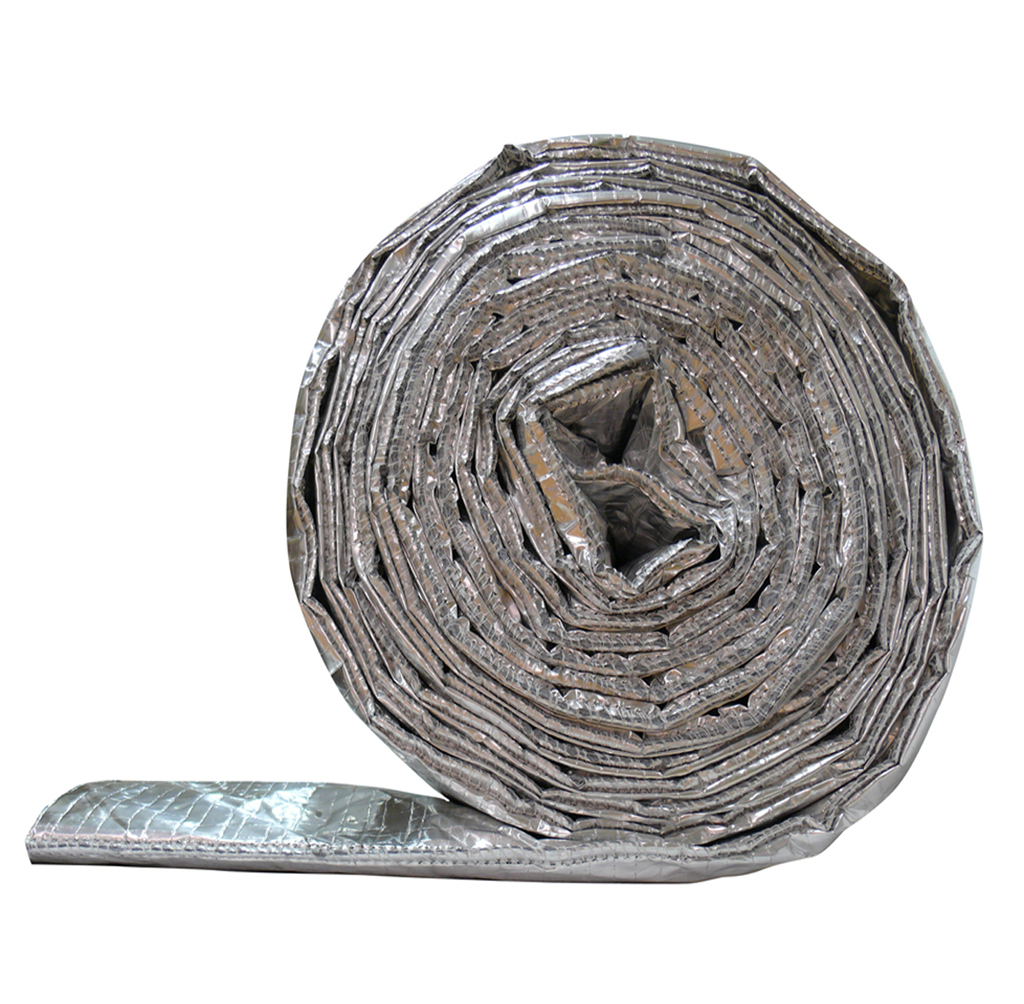
SuperQuilt is a 40mm multi-layered blanket, yet it compresses to approx 10mm. It is certificated for the use in roofs, lofts, walls and also conservatories.
YBS SuperQuilt has been proven to take up less depth, less cost and less labour time compared Rigid PIR boards such as Kingspan.
If you don’t require a pallet and instead require only loose rolls of SuperQuilt, please click here
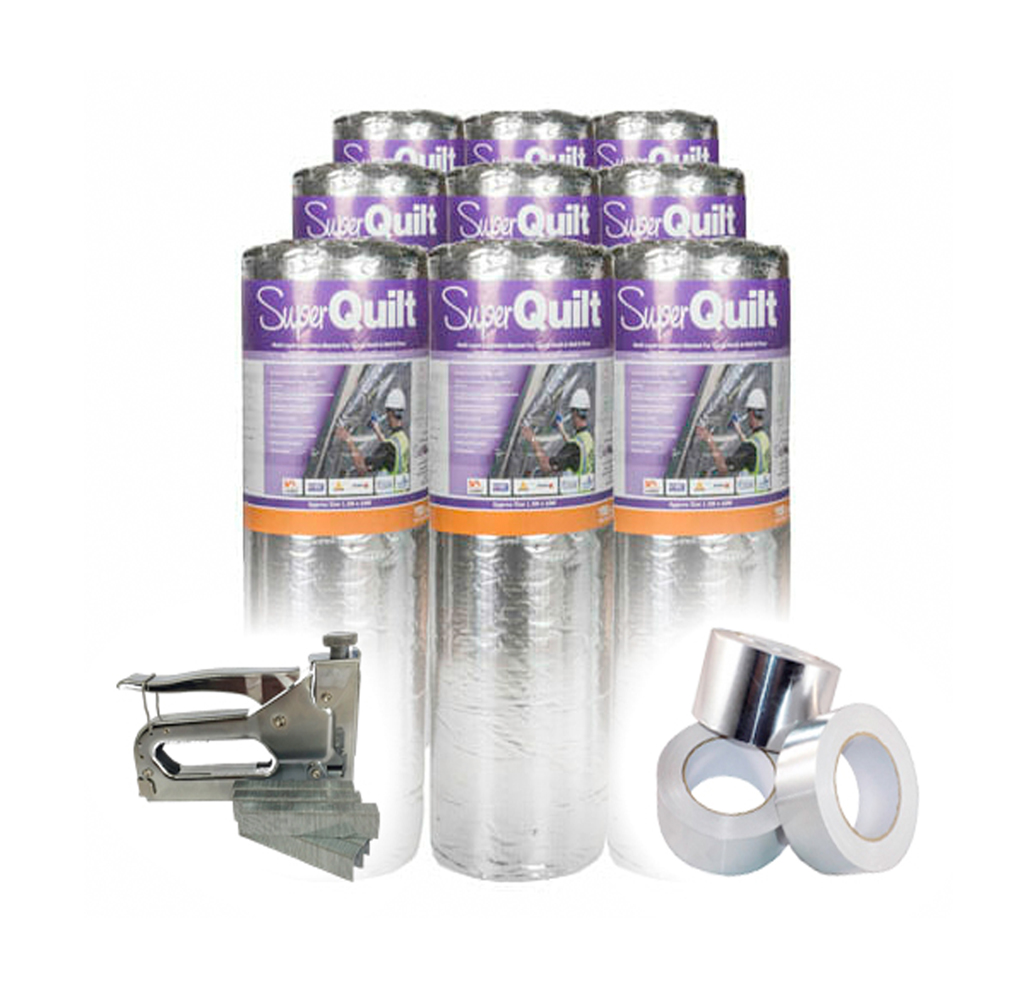
What’s in our YBS SuperQuilt Trade Pallet deal?
- 9 or 10 Rolls x SuperQuilt 1.5m x 10m (15m²)
- 5 x FREE Thermaseal Foil Joining Tape
- 1 x FREE Heavy Duty Staple Gun & 5,000 Staples
Or
- 12 Rolls x SuperQuilt 1.2m x 10m (12m²)
- 5 x FREE Thermaseal Foil Joining Tape
- 1 x FREE Heavy Duty Staple Gun & 5,000 Staples
Or
- 15 Rolls x SuperQuilt 1.2m x 10m (12m²)
- 6 x FREE Thermaseal Foil Joining Tape
- 1 x FREE Heavy Duty Staple Gun & 5,000 Staples
If you are going thorough building control, please visit our trusted distributor: Multifoil Insulation’s free and easy to use Online U-value calculator for instant results. The results of the U-value calculation will then be sent direct to the email address supplied, which can be then sent to building control for instant acceptance.
Here at Multifoils Direct we also deliver SuperQuilt Bulk Discount Pallets anywhere in Europe at a discounted rate – Please see our Export Trade Pallet Deal
SuperQuilt Solutions
Below are the solutions that YBS SuperQuilt is certified for (LABC BBA, and also BDA). The links provided below contain further technical information, fixing instructions and typical U-values which can be achieved;
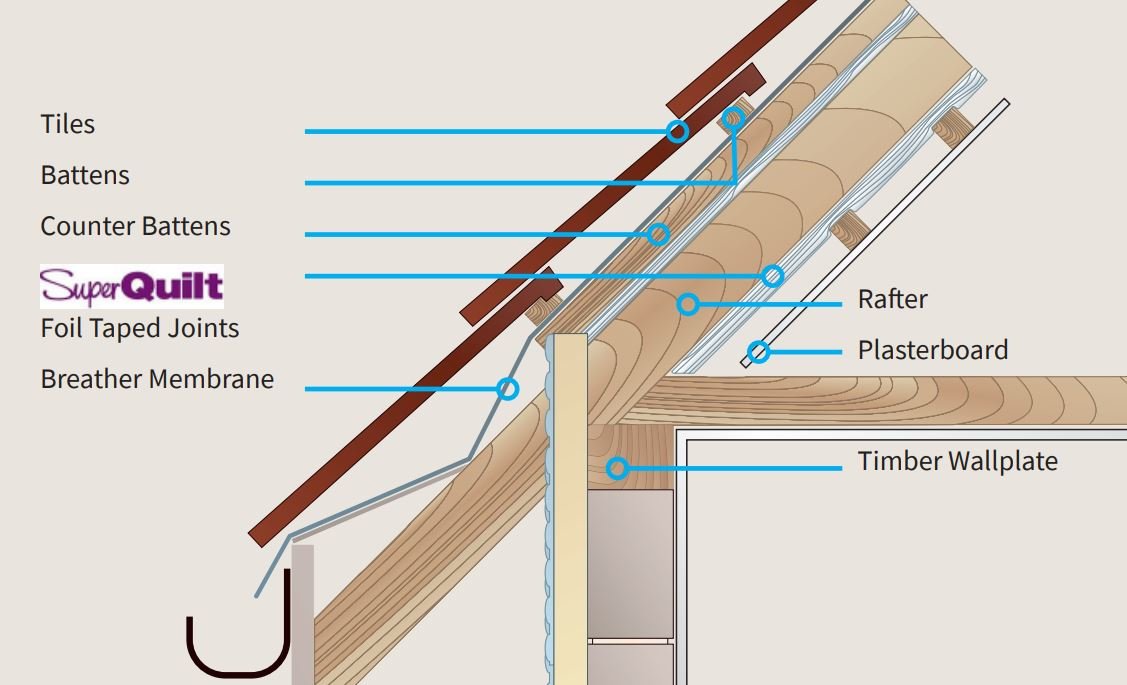
- SuperQuilt Pitched Roof Details – See Link
- SuperQuilt Flat Roof Details – See Link
- SuperQuilt ReRoofing Systems – See Link
- SuperQuilt Timber Frame Wall Systems – See Link
- SuperQuilt Dry Lining Wall Details – See Link
- SuperQuilt External Wall Insulation Details – See Link
- SuperQuilt Suspended Timber Floor Details – See Link
- SuperQuilt Solid/Floating Floor Details – See Link
- SuperQuilt Crawl Space Floor Details – See Link
*If a genuine re-seller is offering SuperQuilt Multifoil at a lower rate, we will beat or match their price!
Order online at the Lowest Online Trade Pricing before 2pm and receive delivery the next working day to the UK Mainland.
FREE GIFT
Spend £500 + VAT and Choose a FREE GIFT at the checkout!
Free Gifts Include: Thermaseal Foil Joining Tape, Heavy Duty Staple Gun Kit, Multifoil Insulation Scissors or Thermaseal Double Sided Tape.
How to Insulate your Loft using a Double Layer of SuperQuilt
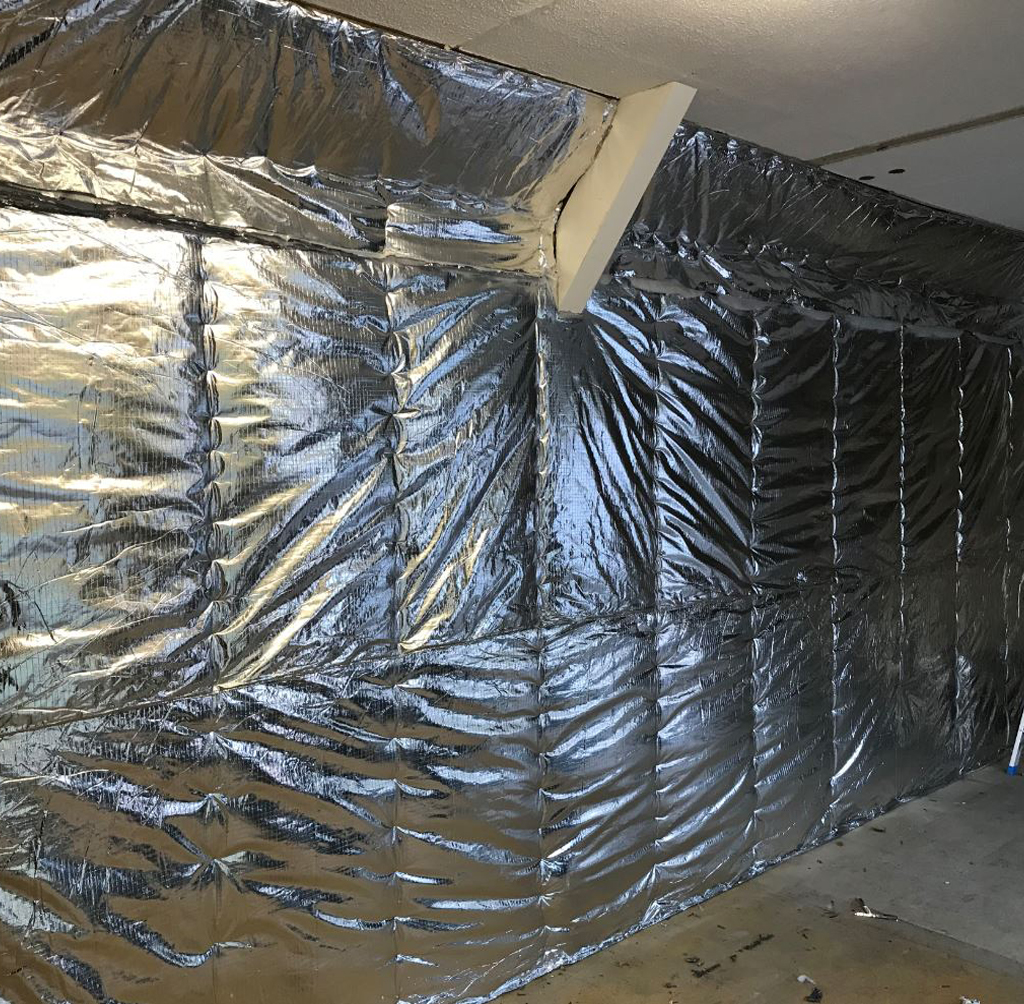
How To Insulate Your Walls using SuperQuilt
Triple Layer 0.18 Re-Roof System
How to install SuperQuilt Insulation on a Flat Roof to meet Building Regulations
How to Fit SuperQuilt Under Rafter
-
Installing first run of SuperQuilt

SuperQuilt can be installed either vertically or horizontally, dependent on rafter height. Staple SuperQuilt to the rafters at spacing's of approx 300mm. Ensure SuperQuilt is pulled taught whilst rolling and stapling.
-
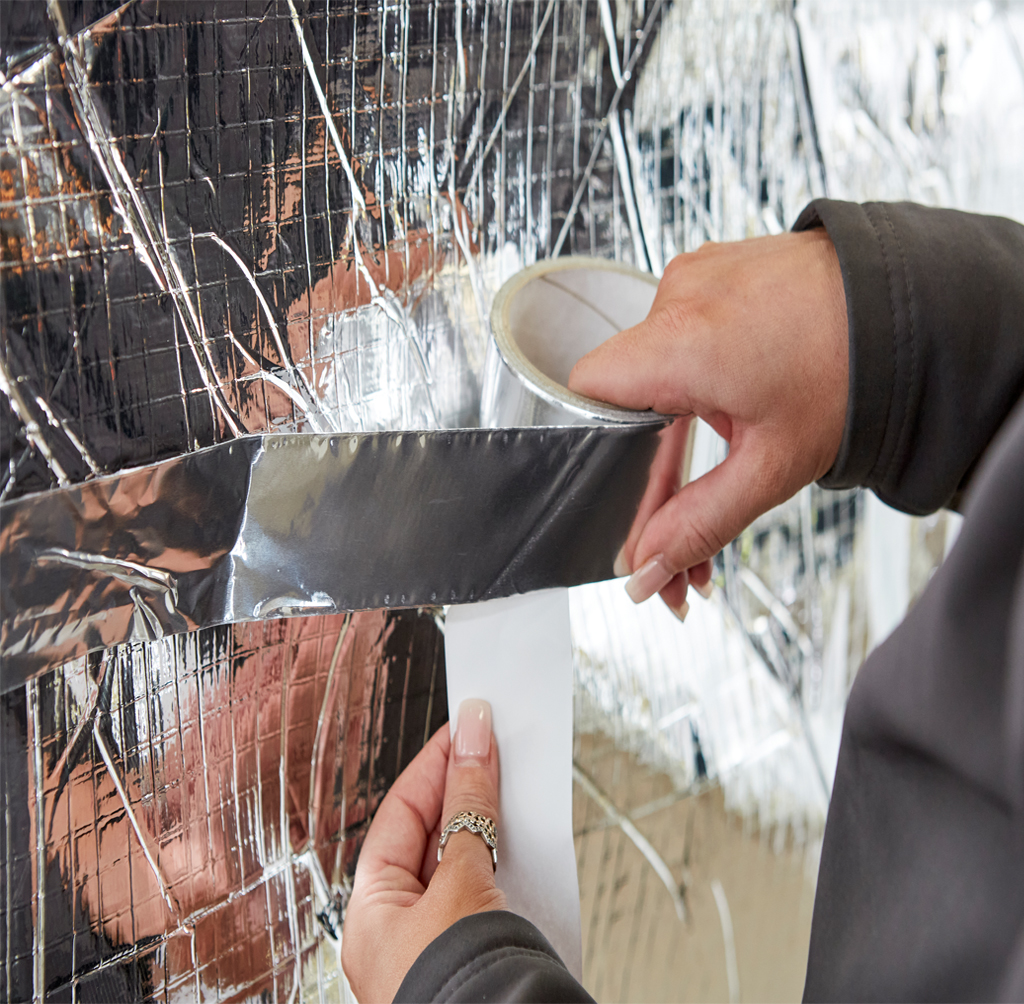
Overlaps & Tapes
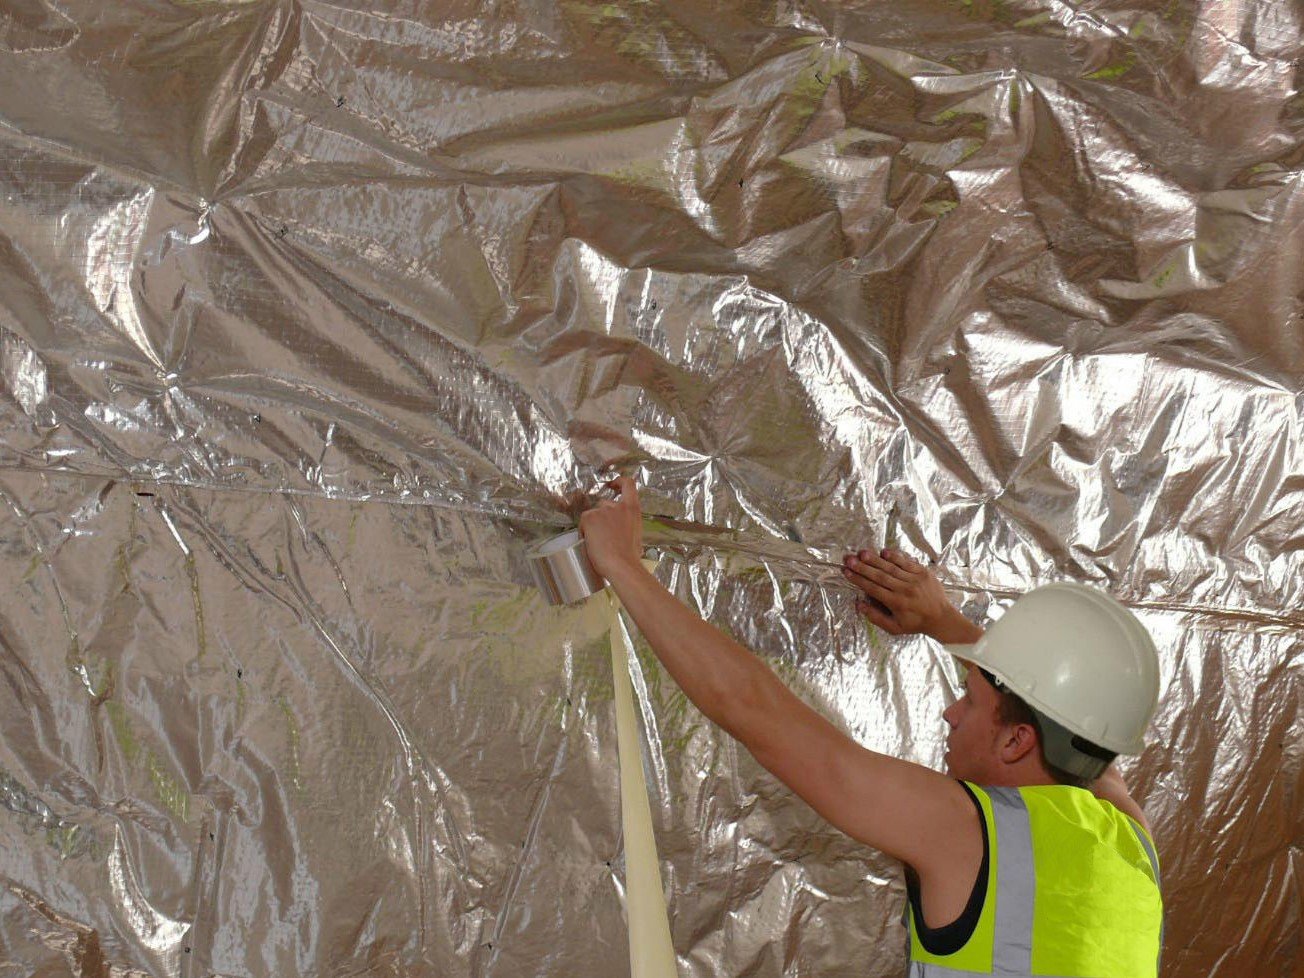
Ensure all SuperQuilt Insulation joints are overlapped by min 50mm. Ensure overlaps are fully taped and sealed using Thermaseal Foil Joining Tape. SuperQuilt can be easily cut using Multifoil Scissors or a Cutting Knife - Both available in our Multifoil Fitting Kit.
-
Eaves Detailing
At the eaves, SuperQuilt is cut around the rafters, and sealed to the cavity wall insulation or wall plate. It is vital to ensure fully taped and sealed, to ensure that an airtight envelope is created
-
Counter Batten
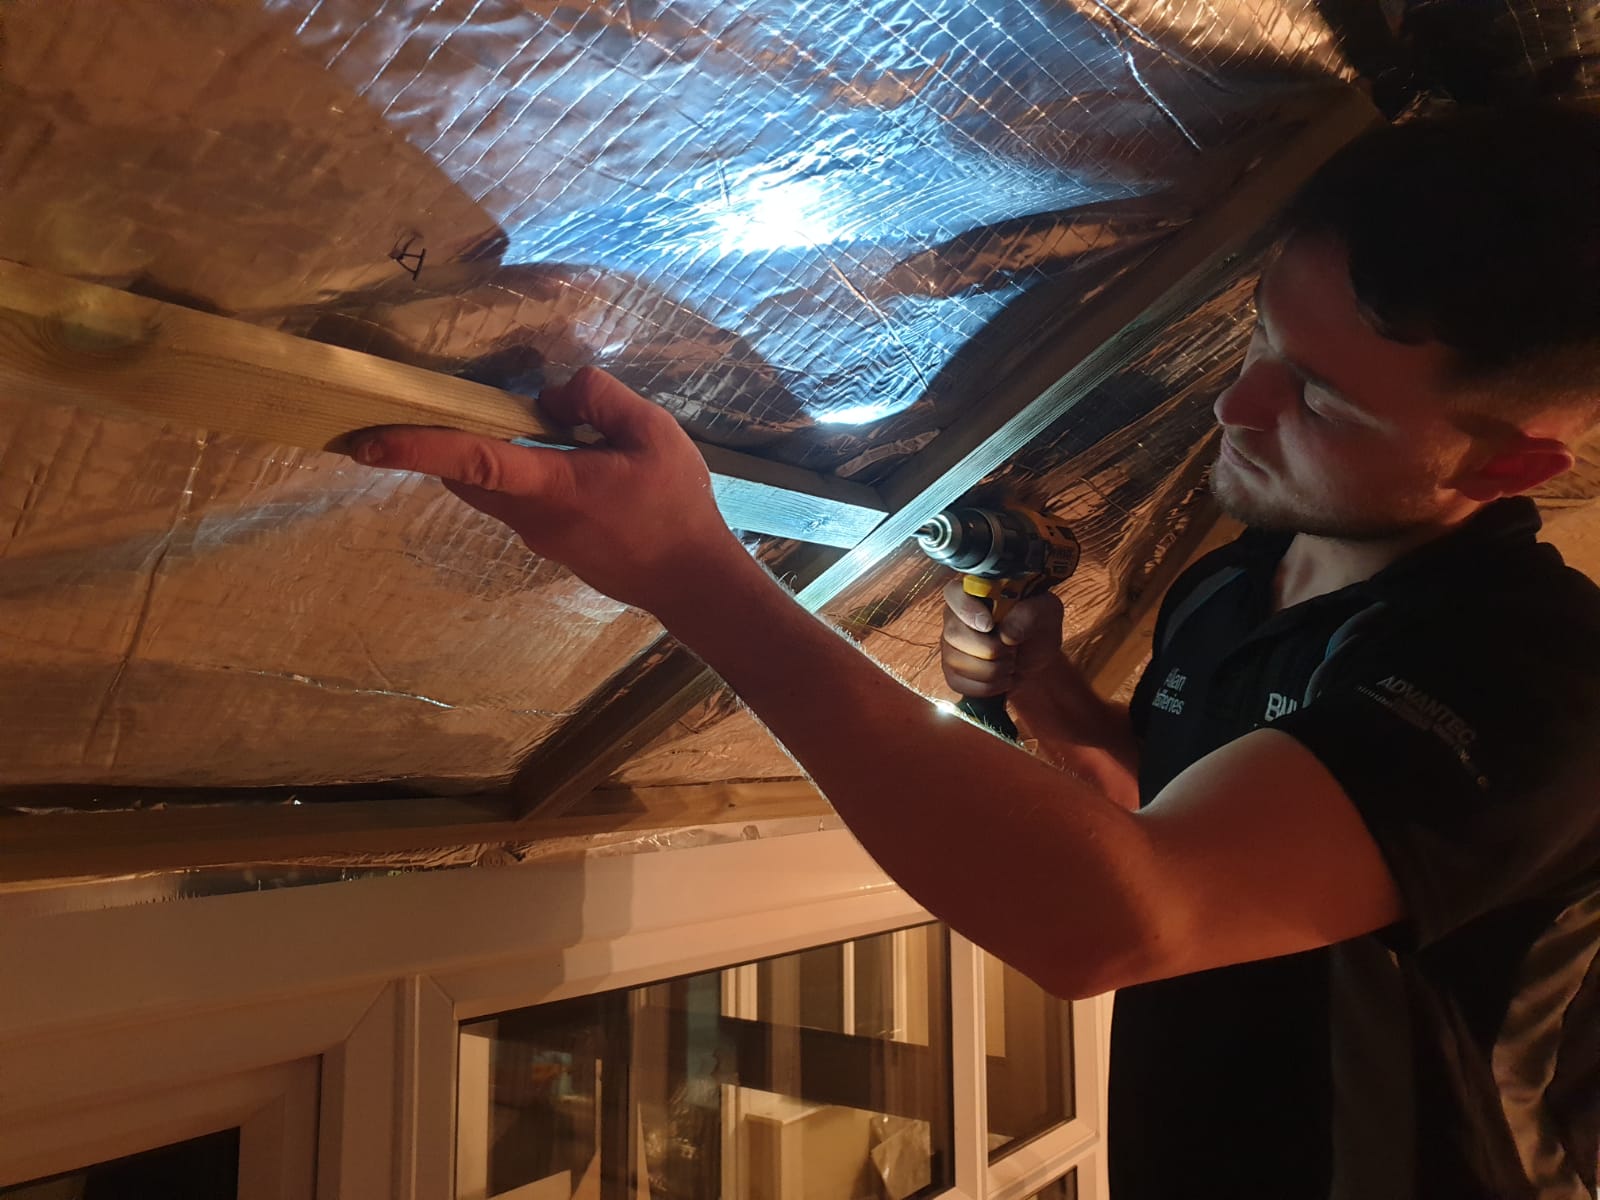
Fix 25mm x 38mm battens at right angles to the rafters. Deeper battens can be used if preferred. Battens also must be fixed around the perimeter of windows.
-
Internal Finish

The plasterboard is then screwed into the battens in the usual manner. When SuperQuilt is installed as the most internal insulation layer, there is no requirement for a foiled-back plasterboard. SuperQuilt will work as a high performing Vapour Control Layer, when taped and sealed using Thermaseal Foil Tape.
How to Fit SuperQuilt onto Solid Walls
-
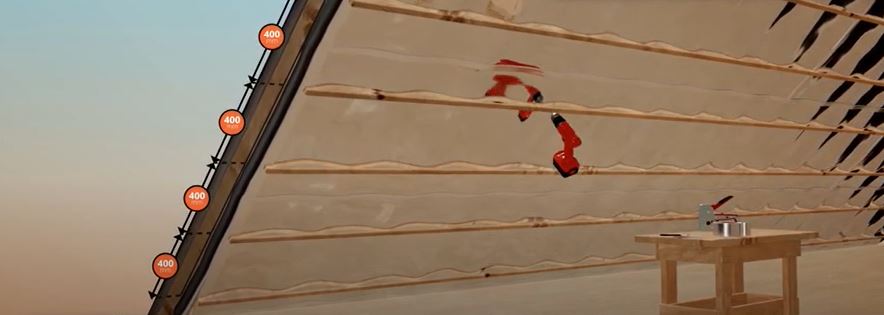
Install Timber Battens
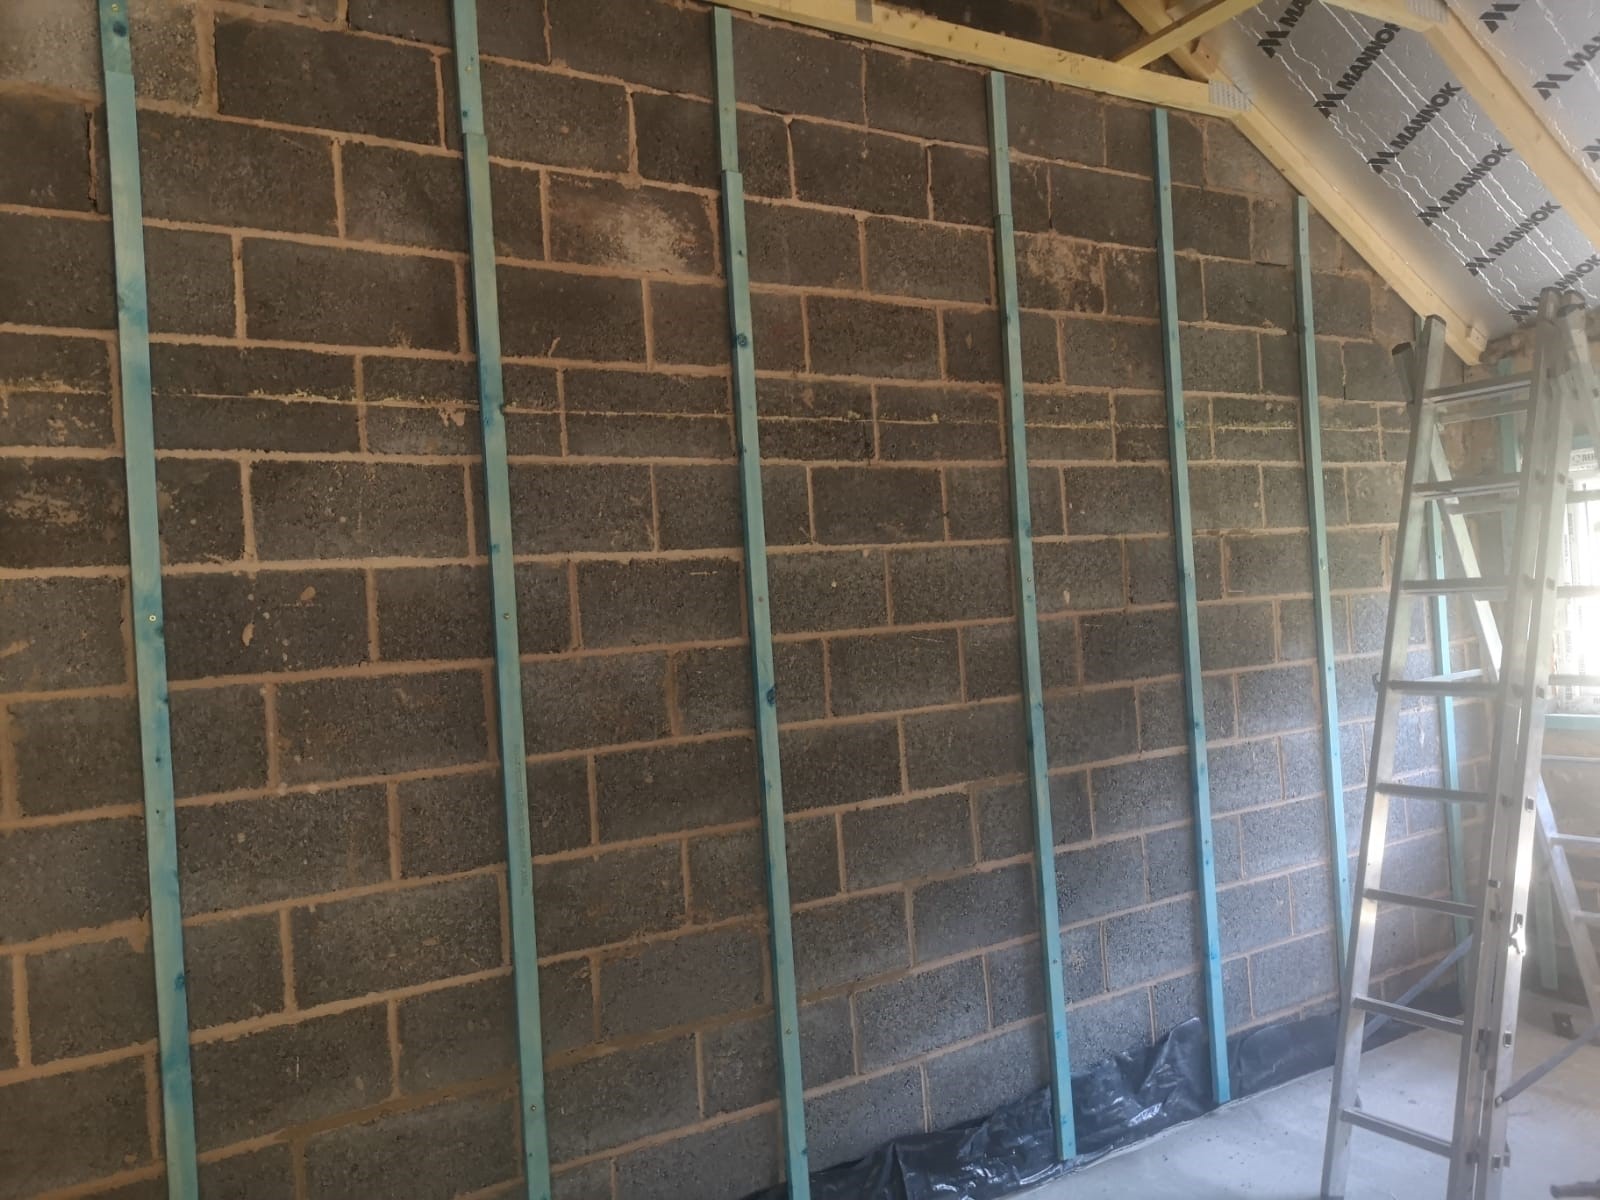
Start by installing treated timber battens directly onto your solid walls. We advise the spacing's to be between 400mm & 600mm centres. Usually the thickness of the battens required are 25mm however this will depend on your desired U-value. To find the recommended batten depth for your project, visit our Free to use Online U-value Calculator.
-
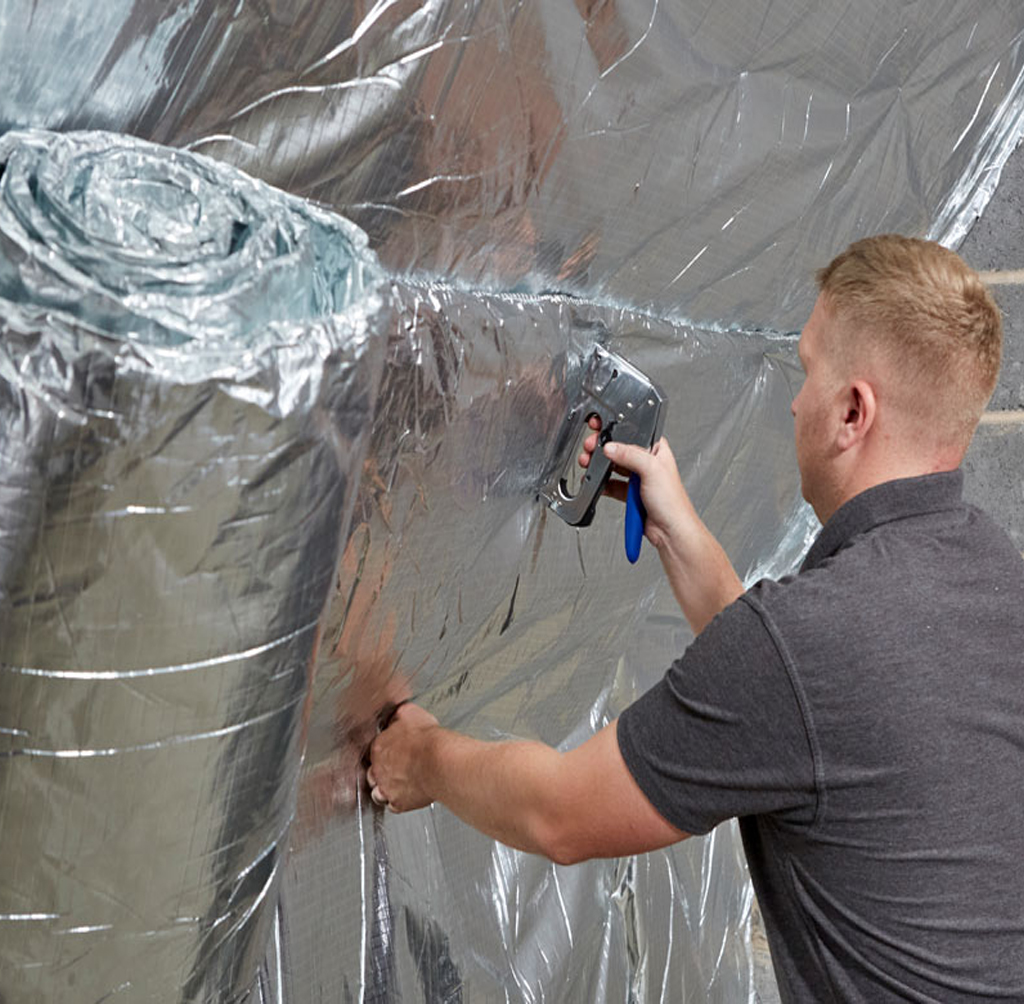
Staple SuperQuilt
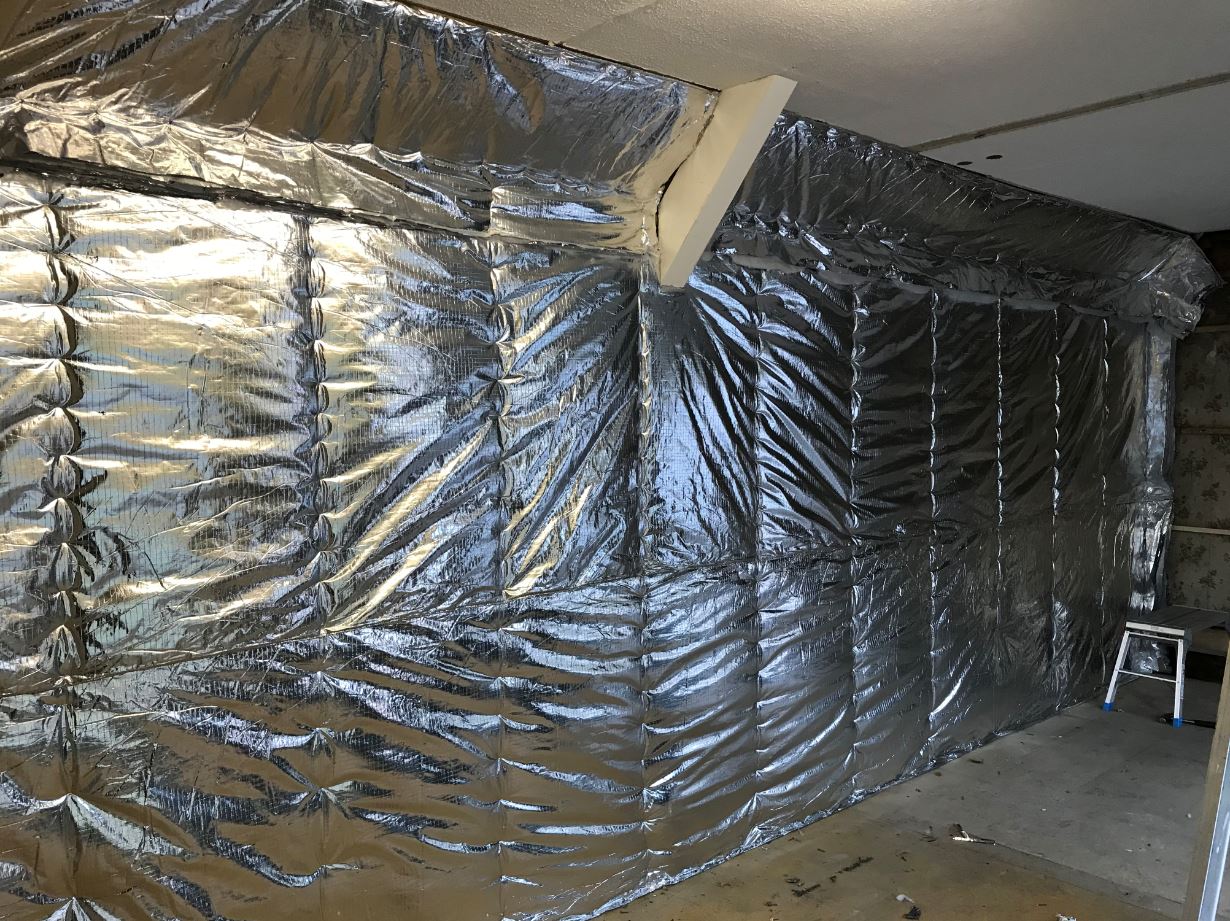
Next, staple SuperQuilt onto the first set of battens, then roll out SuperQuilt horizontally. We recommend the use of 14mm staples when fixing SuperQuilt. Multifoil-Insulation's Fitting Kit includes a Heavy Duty Staple Gun & 5,000 14mm Staples. SUperQuilt can be easily cut using our Multifoil Scissors, available on our website.
-
Overlaps & Sealing
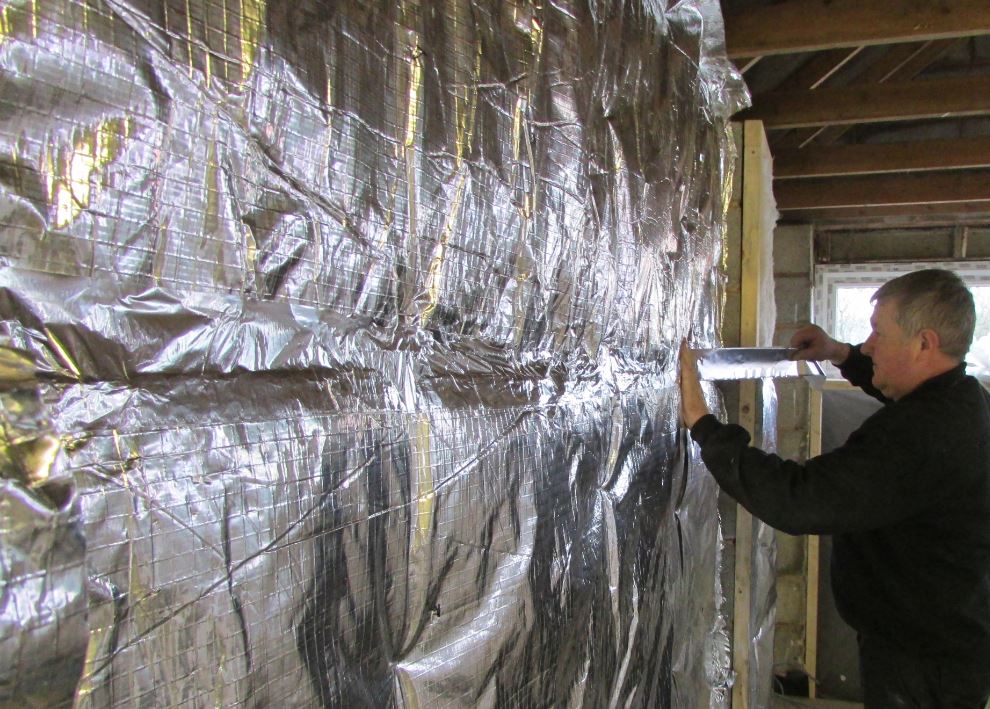
Overlap SuperQuilt by a minimum overlap of 50mm. Tape and Seal SuperQuilt using ThermaSeal Foil Tape. We recommend sealing all overlaps, joints and the perimeter to ensure a complete seal. This will eliminate the risk of condensation.
-
Install Counter Battens
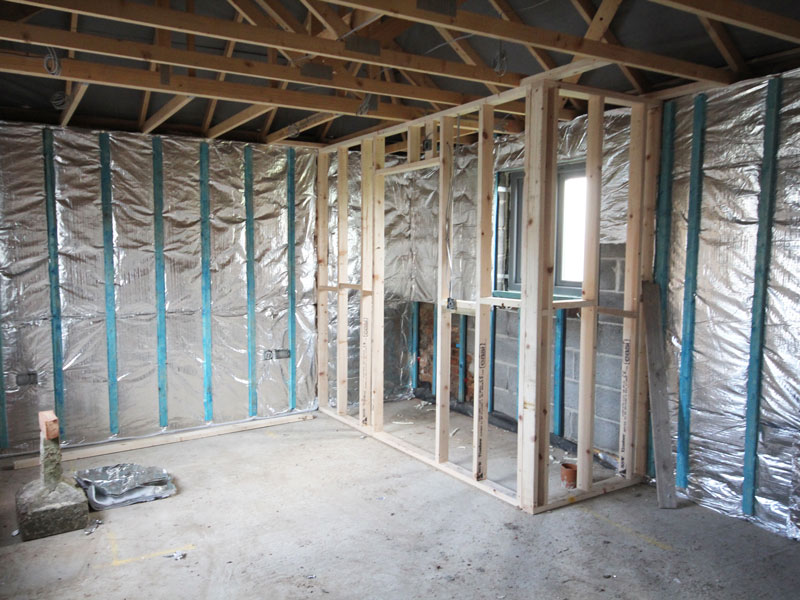
Once SuperQuilt is fully installed and covered, install counter battens over SuperQuilt. We recommend to create a frame around any windows, and around the perimeter. Thickness of batten will depend on desired U-value. To find the recommended batten depth for your project, visit our Free to use Online U-value Calculator.
-
Installing Plasterboard
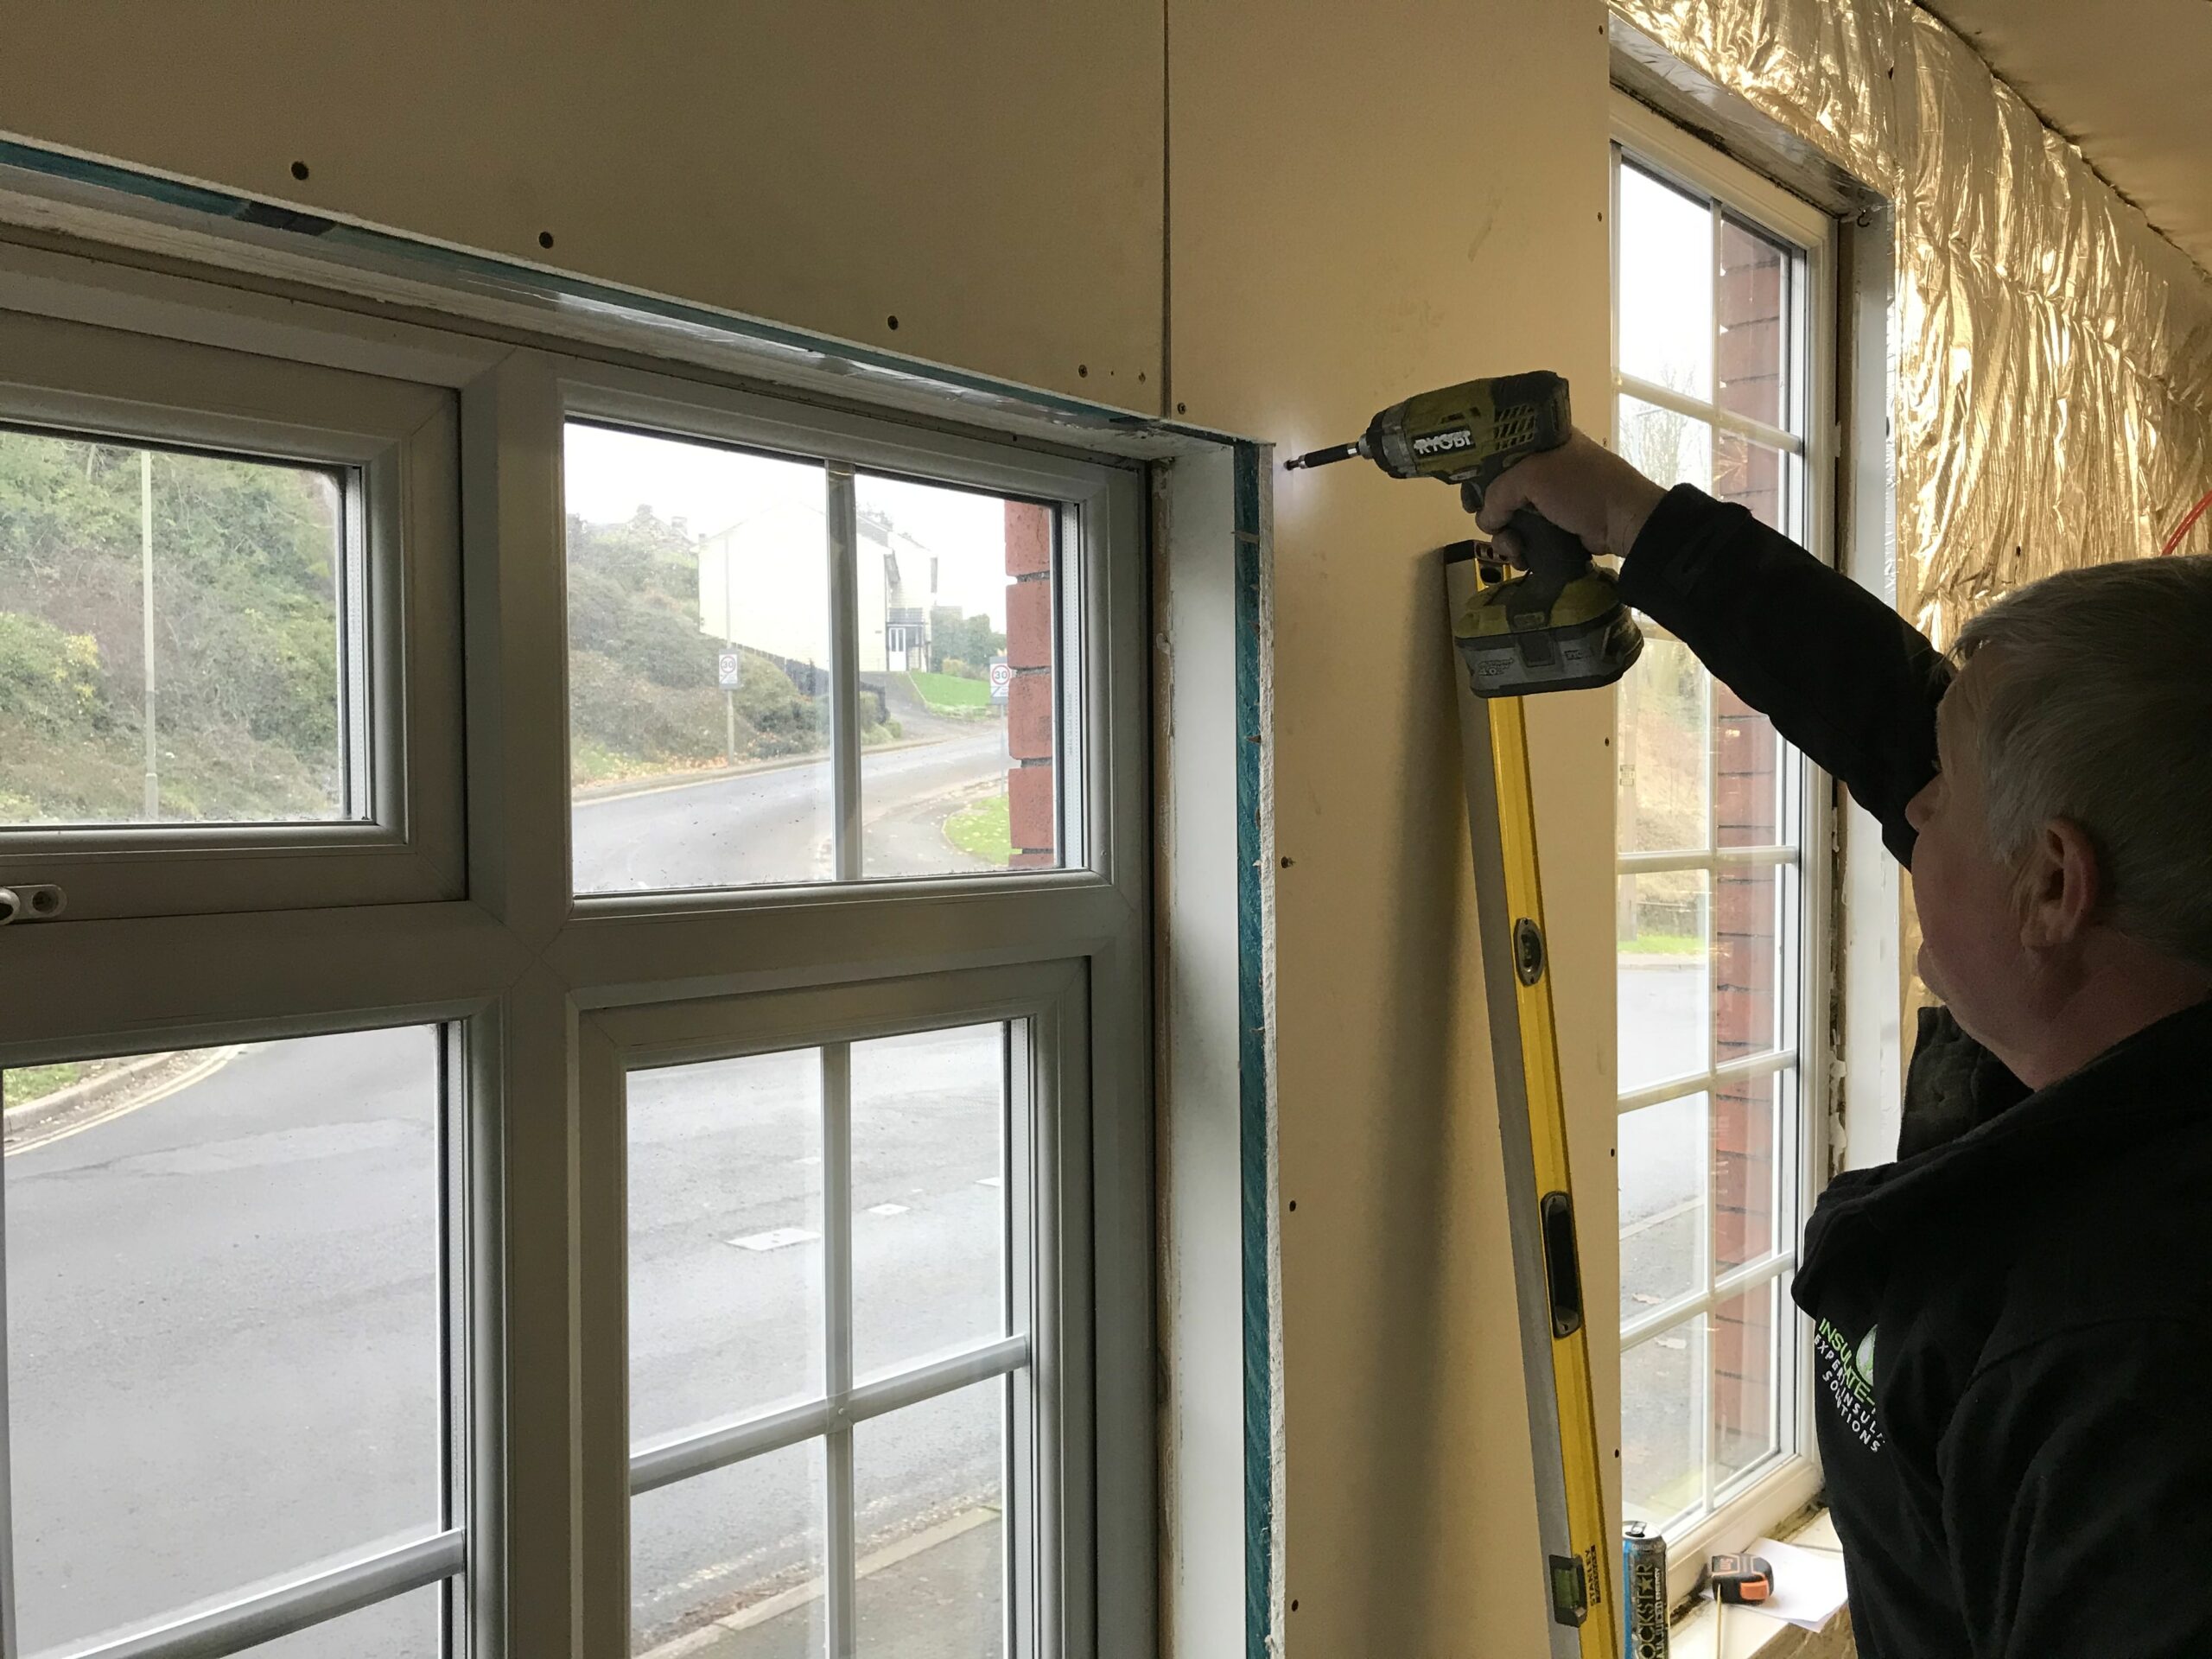
The plasterboard is then screwed into the battens in the usual manner. When SuperQuilt is installed as the most internal insulation layer, there is no requirement for a foiled-back plasterboard. SuperQuilt will work as a high performing Vapour Control Layer, when taped and sealed using Thermaseal Foil Tape. Optional Insulated Plasterboard's can be used for extra thermal benefits and to reach a lower U-Value.
How to Insulate Above a Concrete Floor Using SuperQuilt
-
Installing first run of SuperQuilt
SuperQuilt can be rolled out vertically or horizontally along the concrete floor. Leave enough material at the edges to protrude SuperQuilt Insulation above the floor deck. Ensure the concrete floor is fully clean, flat, and debris free.
-
Joints and Taping
Ensure SuperQuilt is butt jointed with other layers on both the verticals and horizontals. Fully tape and seal all butt joists of SuperQuilt with Thermaseal 75mm Foil Joining Tape.
-
Installing Battens
Timber battens or joists are then laid over the top of SuperQuilt. Ensure the timbers are spaced evenly to suit the particular flooring. SuperQuilt will compress to around 7mm when timber is installed above. We recommend min depth battens of 50mm, using 75 or 100mm joists/battens will give greater thermal benefits.
-
Finish with Flooring
Proceed with installing your timber boarding floor. The deck is then fixed at 200mm centres, with 37mm screws into the joists or battens below
How to Insulate Your Roof Without Any Kingspan or Celotex
-
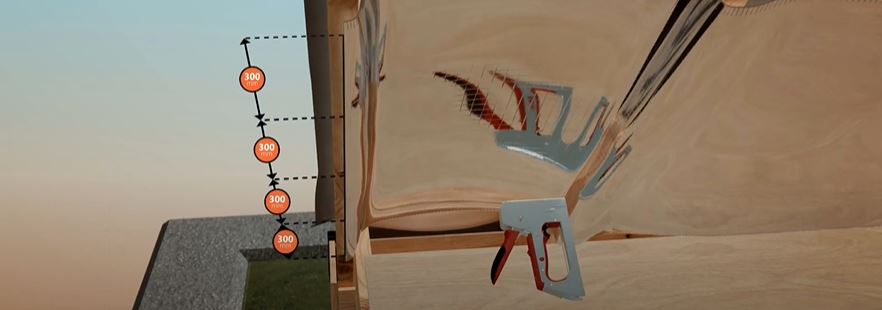
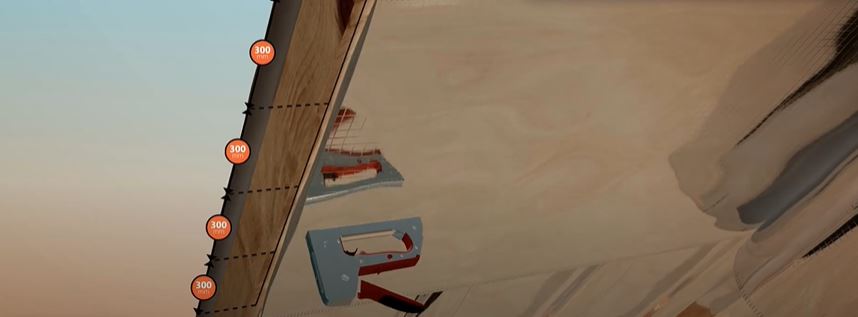
Install your first layer of BreatherQuilt
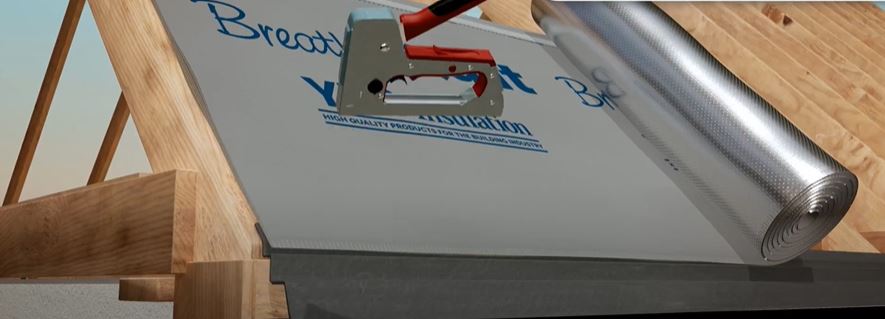
Firstly, install BreatherQuilt Insulation on the external of your pitched roof. The reflective foil will need to be facing inwards. Begin at the bottom of your rafters. Staple BreatherQuilt to the first rafter, using 14mm staples (Max 300mm spacing). Roll BreatherQuilt horizontally across each rafter, stapling continuously to ensure the product is secured. BreatherQuilt should sag between the rafters as opposed to being pulled taught. Ensure that once the tile battens are installed, there is a clear 10mm gap between the top layer of BreatherQuilt and the tile battens.
-
Install next run(s) of BreatherQuilt
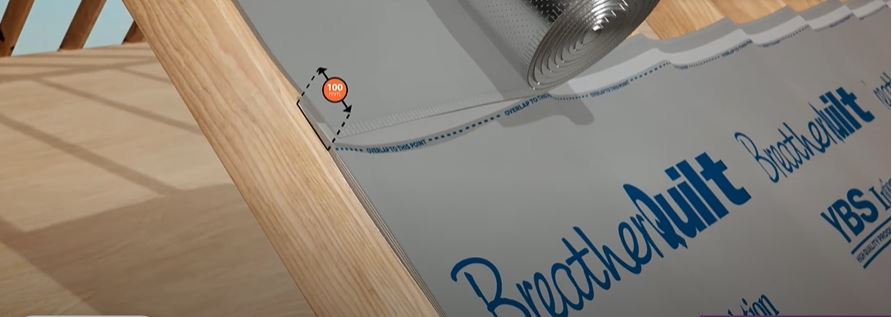
Install the next layers of breatherquilt, ensure that you overlap the product by 100mm. Use the Double Sided Tape that is already on the breatherquilt to secure the two runs and then staple as you did before. Repeat this process as many times as needed, dependent on how many runs are required for the roof. Additional rolls on the verticals should be butt jointed on the rafters. Ensure the butt jointed rolls are stapled as previous and taped using waterproof tape.
-
Install Tile Battens & Tiles
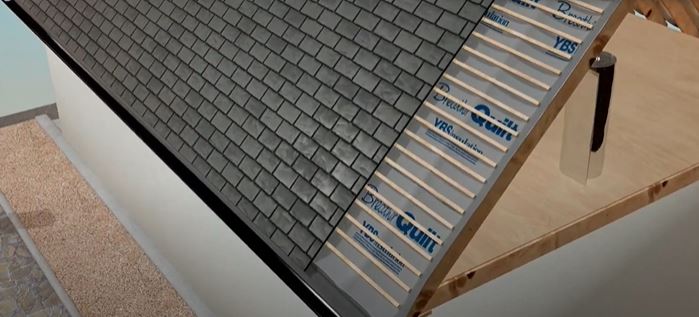
At the eaves, BreatherQuilt should extend onto a suitable eaves carrier. This works in the same method as standard breather membranes. Proceed next by installing horizontal tile battens, on the top of the BreatherQuilt. Finally, finish by install tiles or slates.
-
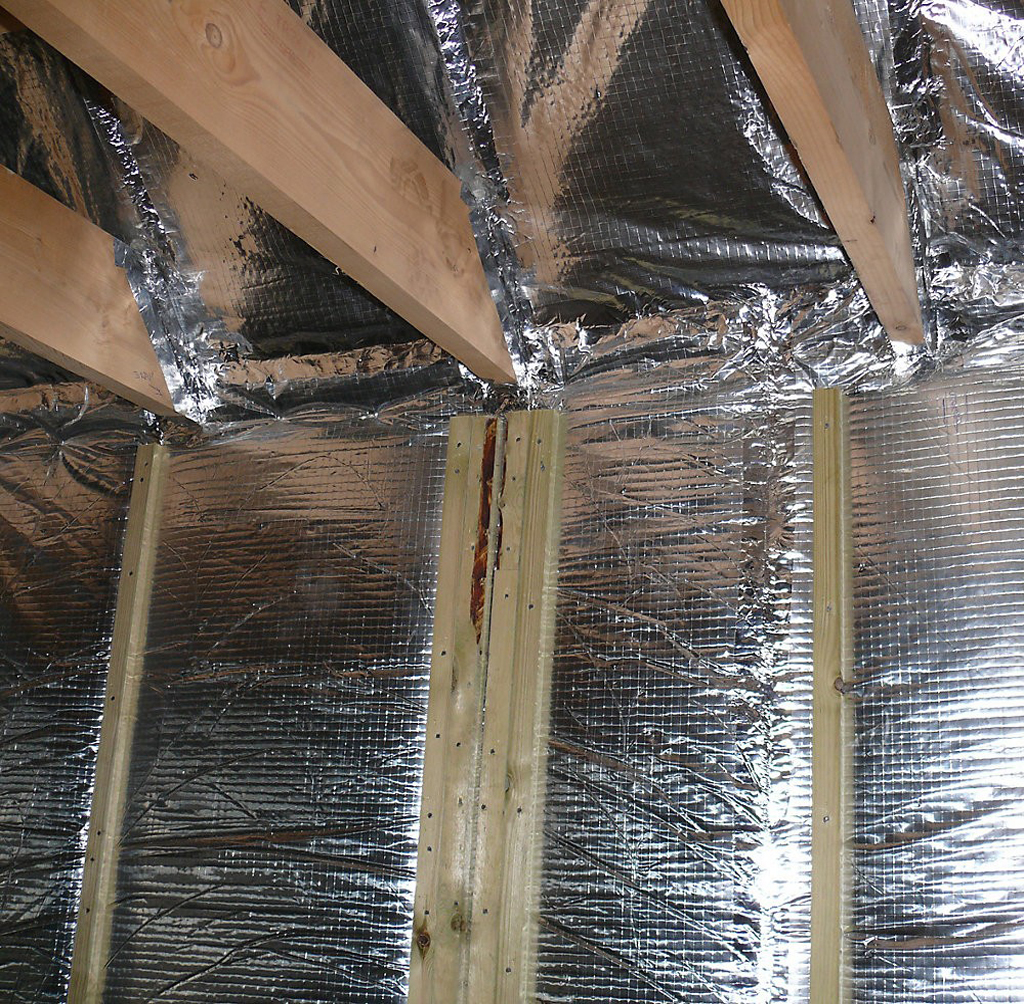
Install the first layer of SuperQuilt
The two layers of SuperQuilt should now be installed on the internal. By internal we are referring to the underside of the roof rafters. The first layer of SuperQuilt is to be recessed in-between the rafters (as per image) Recess by 25mm) and fixed with staples on to the battens. The material is then pulled taught and fixed to the opposite rafter. Tape and seal the first layer, over the laps and around the perimeter.
-
Install the second layer of SuperQuilt
Once the first has been installed then you can now install the 2nd SuperQuilt layer. Staple or nail the second layer through the first layer into the rafters behind. Ensure this layer is also pulled taught, there will then be a cavity between the two layers of SuperQuilt. As per the first layer, the second layer is also overlapped by 50mm. Ensure again the product is fully taped and sealed using Thermaseal Foil Joining Tape.
-
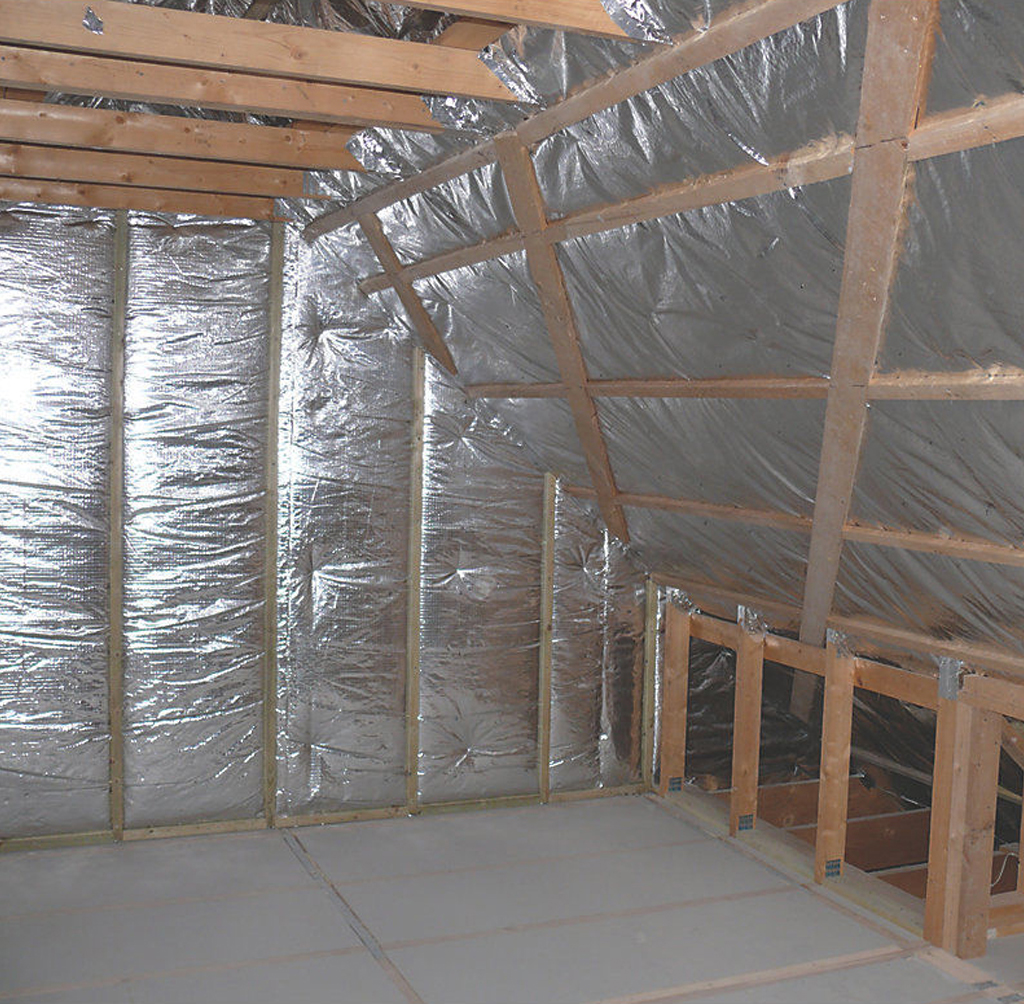
Apply a layer of Timber Battens
Apply a layer of timber battens, leaving at least 400mm between each one. The battens should be 25mm in depth min, to enable the Superquilt to reflect and perform.
-
Internal Finishing

Once both layers are installed and taped, you are ready for your batten & plasterboard. Start by installing min 25mm battens on the insulation. We advise to cross-batten, however vertical battens can be used. Finish by installing 12.5mm Plasterboard. There is no requirement for a Foiled-back plasterboard or VCL. SuperQuilt works as a high performance Vapour Control Layer when taped and sealed.
| Length | 10m |
| Width | 1.5m or 1.2m |
| Thickness | 40mm |
| Coverage | 12m² or 15m² |
| Layers | 19 |
| Weight | 10KG or 12.5KG |
| Core R-value | 1.52m²K/W |
| Roof R-value | 2.50m²K/W |
| Wall R-value | 3.00m²K/W |
| Floor R-value | up to 5.56m²K/W |
| Foil Emissivity | 0.02 |
| Water Vapour Resistance | 1569MNs/g |
Iva –
cracking product & speedy delivery.. Will use again for my conservatory next year!!
Anonymous (verified owner) –
arrived quickly as ordered.
Dan (verified owner) –
Great service!
Robin T. (verified owner) –
Quick service and good product
Gary Heath (verified owner) –
Karen (verified owner) –
Really fast delivery and a great product with the addition of the tape, stapler and staples.